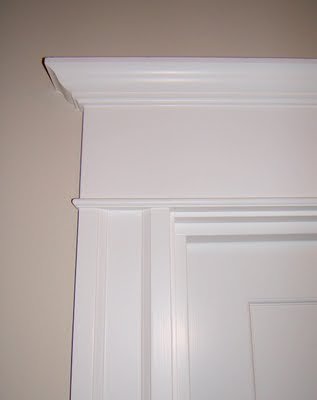
For a while I've wanted to add some molding to our two doorways in , one leads to our kitchen and the other to our hallway. I didn't think adding molding would make a huge improvement in our home, until I saw a great How To on the blog A Charming Nest. They transformed plain doorways into a lovely architectural feature, that added so much character to their home. After seeing their pretty transformation, I knew for sure we had to upgrade the look of our two doorways. I really like the pretty details of A Charming Nest's casing trim and I like the ones I found on Tar Paper Crane.
Pretty!! Love all the details :)

After showing Hasani what I wanted to do, we went shopping at Lowes. We stopped into Lowes and decided to go buy wood for our door casings instead of buying MDF. We decided on wood because, all the of our baseboards are wood and wanted to keep the same look thought out our home to keep everything consistent. We went though all the wood at Lowes, and bought the straightest and smooth wood we could find.
6: 4x8 (each one 1 inch thick)
4: 2x8 (each one 1 inch thick)
4: 1x8 (each one 1 inch thick)
6: Lattice pieces
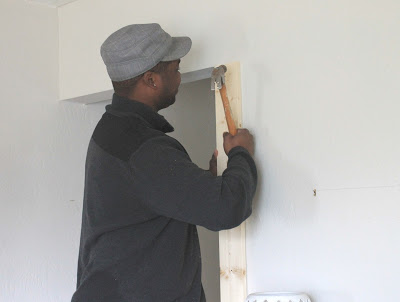
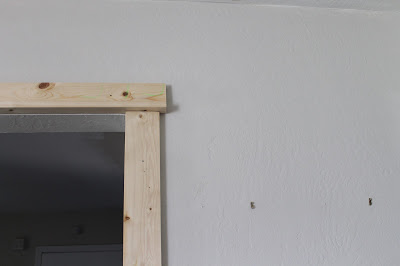
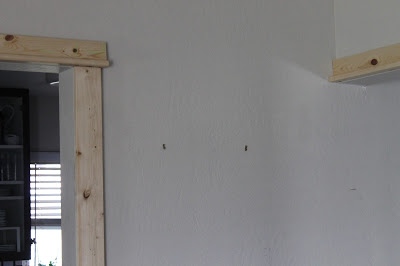
We took all of our pictures down near the walls we would be added trim to. Next Hasani has sections of the bottom baseboards on both sides of the the doorway. Then we measured marked each board and made the cuts. So far both the front and back wood trim and header is on the doorways. We love the look of the doorway casing trim in the 1st picture above, however we have to keep ours looking more simpler since we have a 1950's California Rancher. You know so it doesn't look overdone. Here's how's ours currently looks, still much much more work to be done.
After going back and forth over leaving the top of the header plain or adding a little molding detail, we've decided to a little trim to give it a more finished look. We still have a lot left to do, I'd say were about 50% done.
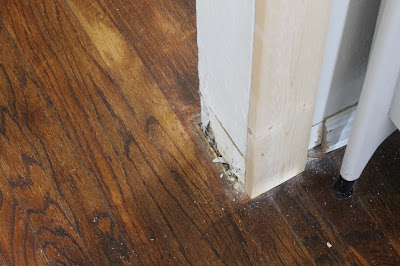
We still need to: add miter corners on the inside if the doorways for a nice finished look. Add latices (thin strips of wood) on the inside of the doorways to hide seams where the wood meets the inside frame of the doorway. Fill all imperfections for wood filler, lots of wood filler! Sand, Prime then paint all the trim glossy white! We also plan to change out our front door trim, with trim that matches are garage door trim, since both over those doors are can be seen from the same room, we want to keep things consistent.
I plan on paint lots and lots of trim over the next few days. I'm going to repaint all the trim in our hallways and touch up trim paint in our living room. I think I mentioned before that, some of our white trim got stained while Hasani and my Dad where finishing our Hardwood Floors last year. I was way too pregnanthuge and tried to attempt re-painting the trim. My Dad did some touch ups for me in the Nursery (thanks Dad) Anyways I've been putting off re-painting the trim for far too long. We should be done in a few days, and I'll have more before, during and after pictures to share!
What do you think of our new door way look so far? Have you ever added casing to your doorways? Any project, like trim paining you've been putting off like me?

Pretty!! Love all the details :)
{ via A Charming Nest }
{ via Tar Paper Crane }
After showing Hasani what I wanted to do, we went shopping at Lowes. We stopped into Lowes and decided to go buy wood for our door casings instead of buying MDF. We decided on wood because, all the of our baseboards are wood and wanted to keep the same look thought out our home to keep everything consistent. We went though all the wood at Lowes, and bought the straightest and smooth wood we could find.
6: 4x8 (each one 1 inch thick)
4: 2x8 (each one 1 inch thick)
4: 1x8 (each one 1 inch thick)
6: Lattice pieces
We took all of our pictures down near the walls we would be added trim to. Next Hasani has sections of the bottom baseboards on both sides of the the doorway. Then we measured marked each board and made the cuts. So far both the front and back wood trim and header is on the doorways. We love the look of the doorway casing trim in the 1st picture above, however we have to keep ours looking more simpler since we have a 1950's California Rancher. You know so it doesn't look overdone. Here's how's ours currently looks, still much much more work to be done.
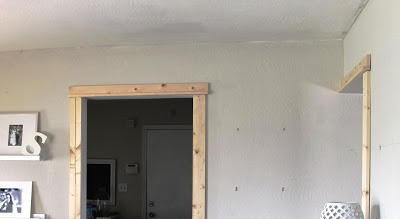
Oh, I'm already in love how with how the doorways look! Even there were only halfway done. The thick almost 4 inches wide (to me) wood trim really makes our average sized doorway appear larger and the ceilings look taller. I like when little updates make huge improvements.
After going back and forth over leaving the top of the header plain or adding a little molding detail, we've decided to a little trim to give it a more finished look. We still have a lot left to do, I'd say were about 50% done.
We still need to: add miter corners on the inside if the doorways for a nice finished look. Add latices (thin strips of wood) on the inside of the doorways to hide seams where the wood meets the inside frame of the doorway. Fill all imperfections for wood filler, lots of wood filler! Sand, Prime then paint all the trim glossy white! We also plan to change out our front door trim, with trim that matches are garage door trim, since both over those doors are can be seen from the same room, we want to keep things consistent.
I plan on paint lots and lots of trim over the next few days. I'm going to repaint all the trim in our hallways and touch up trim paint in our living room. I think I mentioned before that, some of our white trim got stained while Hasani and my Dad where finishing our Hardwood Floors last year. I was way too pregnant
What do you think of our new door way look so far? Have you ever added casing to your doorways? Any project, like trim paining you've been putting off like me?