As promised, I'm back sharing my revised how to on sewing back tab drapes for the drapery panels I shared yesterday. I'm so proud of myself I might add since my last how to on Roman Shades took me forever to write & post!! For those of you new to back tab drapes, they are a hybrid of standard pole pocket & top tab drapes and more casual than pleated drapes. I made a few minor adjustments to my original How to Sew Back Tab Drapes and thought I share my new how to.
Getting Started
Here's a list of supplies you'll need for this sewing project.
Sewing Machine, Lots of Pins, Iron, Measuring Tape, 2-3 Ribbon, Thread [that matches your fabric] Scissors.
Determine Length
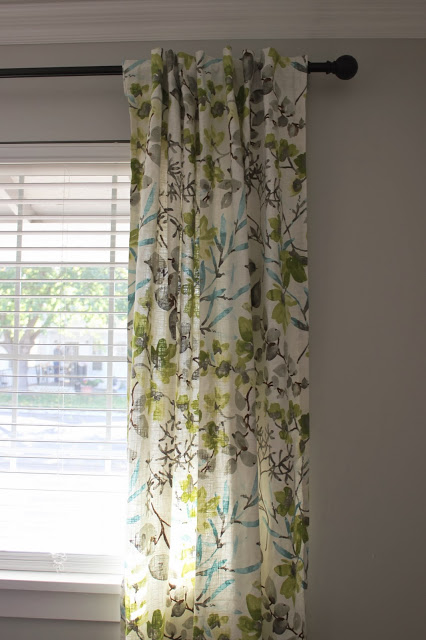
I love long panels, and decided to sew 90 inch panels, my curtain rod is hung seven inches above my window and seven inches past my window in both sides. I love how long panels hung high and wide help give the illusion of extra tall ceilings. After I hung the rod, I measured from the top of the rod to the bottom of my floors and determined 90 inches would grave the floor and puddle just a little.
Again my new drapes in our dining room are 90 inches long, I used 5.5 yards of fabric total, each panel total before being hemmed is 99 inches long.
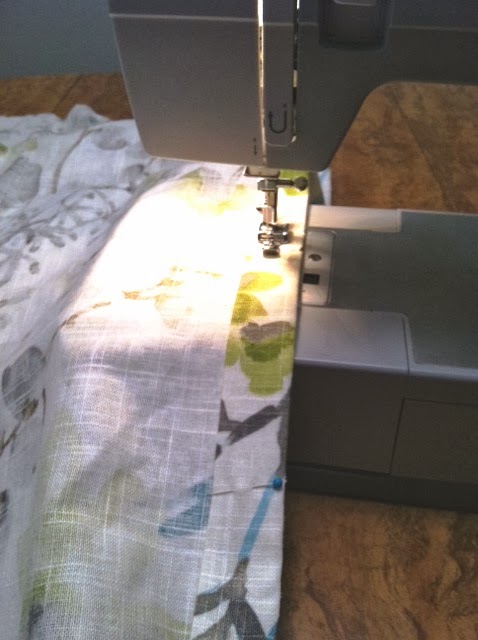
Sewing the Sides


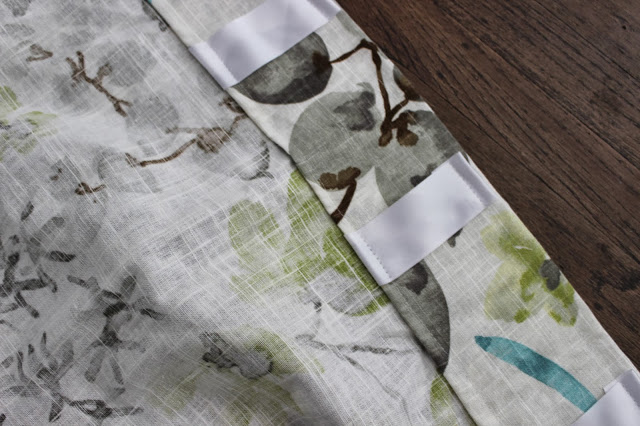
Here's the how the top of my drapery panels look after the ribbon has been sewn on the fabric.

Bottom Hem
Since, I'm sewing 90 inches panels and used 5 inches of fabric for the top of my drapes, I have 4 inches left for the bottom hem. You can make your bottom hem smaller and use less fabric its a personal choice. For 4 inch hems, hem the fabric over one inch and iron. Next fold the fabric over three inches, pin and then iron and sew!

Next hang your pretty curtains and pat yourself on the back!! See all the pretty folds in my drapes, all from those pretty back tabs!

Yay for pretty DIY curtains!! If you have any questions about my how to please feel free to ask in the comments or send me an email at chiclittlehouse@gmail.com
Getting Started
Here's a list of supplies you'll need for this sewing project.
Sewing Machine, Lots of Pins, Iron, Measuring Tape, 2-3 Ribbon, Thread [that matches your fabric] Scissors.
Determine Length
I love long panels, and decided to sew 90 inch panels, my curtain rod is hung seven inches above my window and seven inches past my window in both sides. I love how long panels hung high and wide help give the illusion of extra tall ceilings. After I hung the rod, I measured from the top of the rod to the bottom of my floors and determined 90 inches would grave the floor and puddle just a little.
Again my new drapes in our dining room are 90 inches long, I used 5.5 yards of fabric total, each panel total before being hemmed is 99 inches long.
Fold over your fabric on each side one each and then fold another inch, then pin and iron. I often iron and pin a lot while working on sewing projects to help create a nice clean line when I sew. Folding over your fabric two times helps give your sewing project a much more professional and clean look. My goal is always to make it look like I bought it that way, even if no one ever sees the underside. Once both of the sides of the fabric are sewn its time to create the back tabs.
Sewing Back Tabs
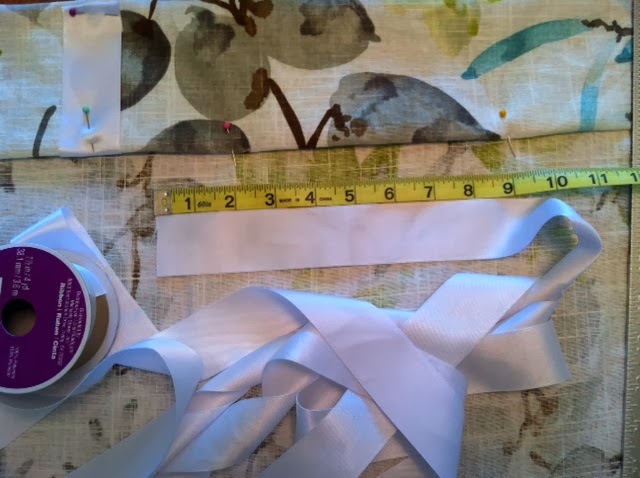
The back tabs help create the look of nice folds and pleats in the fabric while its hanging. I bought inexpensive 2 inch ribbon from Micheal's for $2.99 per roll and only needed one roll for this project. Cut your ribbon into six inch stripes.
If you have a floral pattern or pattern drape consider which way you want the design to hang on the rod. Now that you've decided the top of your fabric, its time to make the header for your back tabs. At the Top of your fabric, fold it down one inch then iron. Next fold your fabric down four inches and pin. Next pin your going to pin your ribbon to your fabric to create the folds, start from one side.
Fold under the top of your ribbon once inch, then pin to your fabric [Pin the ribbon a little under the top of the fabric] Next fold the fabric under the bottom of your header. See Example below. I love that tucking the ribbon under the header creates a nice clean look [yup, I sound crazy! lol]
Next, Pin the next ribbon strip to your fabric, I spaced mine all five inches apart to crate nice deep folds in the fabric once its hangs on the rod. Keep pining the ribbon on the fabric in five increments. Once your ribbon is all pinned to the fabric, sew the top of the header then the bottom of the header.
Bottom Hem
Since, I'm sewing 90 inches panels and used 5 inches of fabric for the top of my drapes, I have 4 inches left for the bottom hem. You can make your bottom hem smaller and use less fabric its a personal choice. For 4 inch hems, hem the fabric over one inch and iron. Next fold the fabric over three inches, pin and then iron and sew!
Next hang your pretty curtains and pat yourself on the back!! See all the pretty folds in my drapes, all from those pretty back tabs!
Yay for pretty DIY curtains!! If you have any questions about my how to please feel free to ask in the comments or send me an email at chiclittlehouse@gmail.com