Seasonal Reminder

Monday, September 30, 2013

I love seeing artwork in kitchens it really helps warm-up and helps personalize the space. I've been on the lookout for pretty and meaningful artwork for our kitchen and recently came across some on pretty ones on Etsy from the seller Nourishing Notes. We had a blank space above our stove, that I thought would make the perfect spot for artwork. Here's how the stove area looked before adding artwork. 


I chose ordered the letterpress print, 'Cook with the Seasons' for our kitchen. I love this daily reminder for our kitchen, its a reminder to cook seasonally and use fresh ingredients.   


The print even arrive with this little note for A Pleasant Picnic recipe. It's such a cute note that I just had to share. 


I bought a simple white frame from Target [I'll always love Target & Ikea simple white frames] I placed the frame in the spot before hanging, to confirm it would look good. I was a little nervous it so-so because the background of the was cream verses white. But I like how the cream warms up the frame & kitchen.


We didn't want to hang anything permanate so we decided to use the 3M Command Stripes. We followed the directions of the snap stripes, using four medium size stripes to holdup our print. All you need for the stripes is rubbing alcohol, cotton swabs and a level. 


Here's our kitchen now when the new artwork in place. Also please feel free to ignore my outline while snapping these pictures! 


There's our little kitchen update, I also want to give a quick update on our hardware situation, still waiting on hardware samples to arrive, they one were mostly likely going with is on back order.

What do you think of artwork in kitchen? 

DIY Customized Roman Shades

Wednesday, September 25, 2013

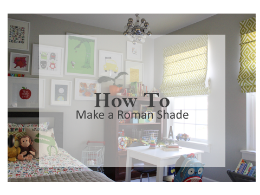
I finally finished up Avery's twin roman shades for his bedroom, along with lots of help from one my friends! So thankful to have friends who love tackling DIY projects and willing to lend a hand. After being inspired by this and this image on Pinterest, I knew roman shades where a must for his bedroom. I just love patterned roman shades in kids rooms. They add another layer or color and whimsy in a room, I'm a fan of kids rooms being full of color, fun and all about the kid. Custom roman shades can be very expensive depending on the window size and fabric selection. 

I wanted to make sure the roman shades were fully functional (I would be able to open and close them) rather then making stationary faux roman shades so I decided to buy 'ready made roman shades' and customize them using fabric of my choice. I'll share a complete how to on Thursday for those of you interested in this Semi DIY No Sew project, yep no sewing involved and they remain fully functional! 

Here's what the roman shades looked like when I bought them and after hanging them up in Avery's room, they looked nice, but way to 'safe' and 'plain' for a toddlers room! Pretty much a snoozefest, lol. 

Roman Shades Before


 I loved the idea of using a  bold graphic geometric fabric for his roman shades, after seeing these pillows on Pinterest, I was determined to find a similar fabric as the David Hicks La Foirentina (with out the cost) I loved how fun these pillow were and knew a similar fabric would look amazing as roman shades. I used the Richloom fabric Dixon in the color Kiwi. The fabric I bought is the more affordable version of the La Foirentina for around $10.99 per yard.

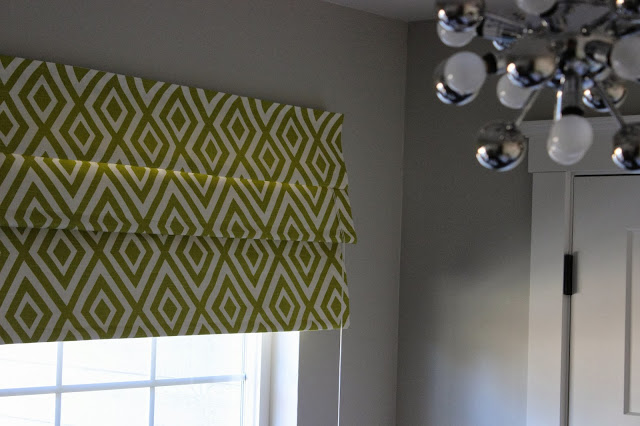
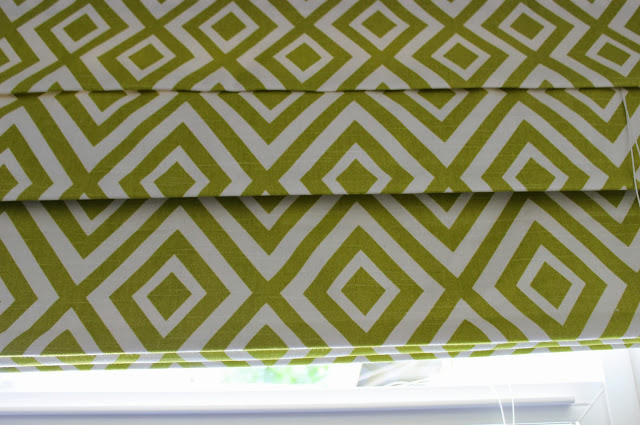
 The Roman Shades really add so much color and fun in his room. The geometric print, doesn't overwhelm the room. I've pretty smitten with this shade of chartreuse color in the geometric fabric (perfect happy color for my sons toddler room)

DIY Customized Roman Shades


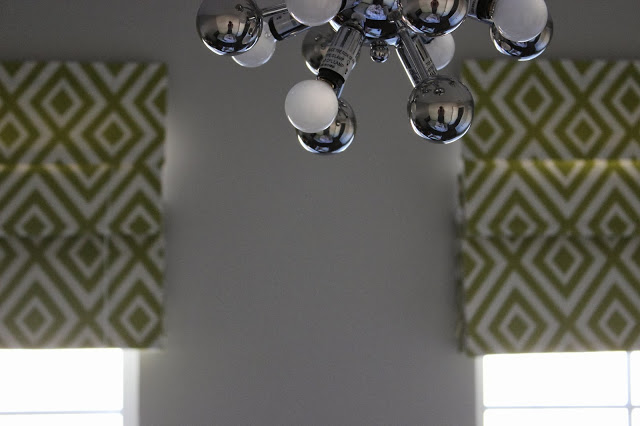
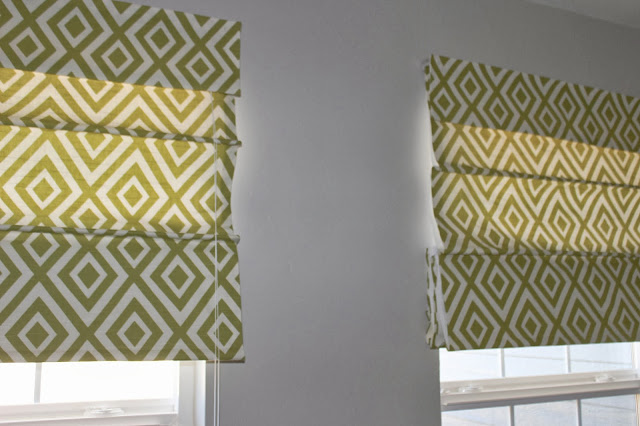
The roman shades are perfect mirror images of each other from left to right. 


This picture below captures the color best in real life. A fun bright chartreuse green without being in your face. 


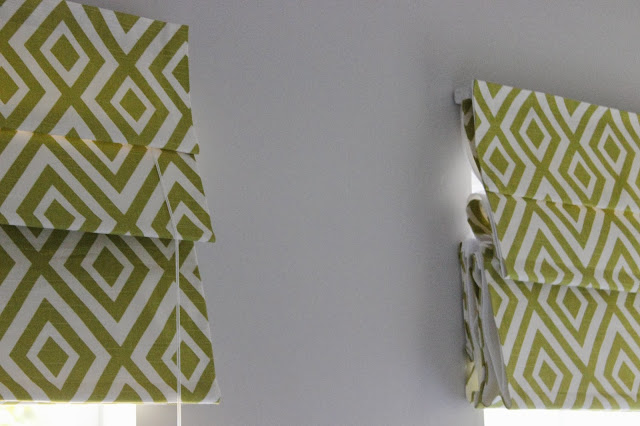
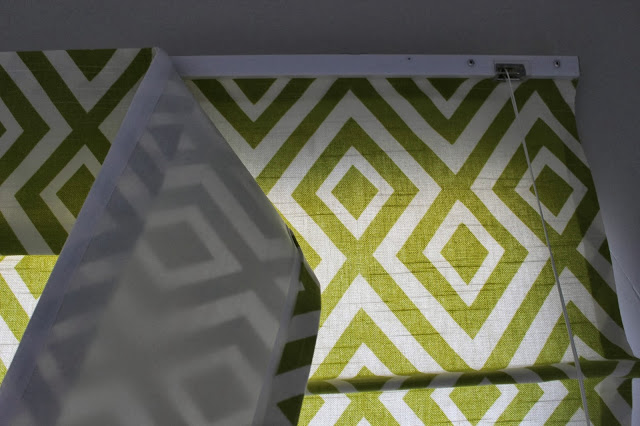
When the roman shades are half closed they help provide room darkening, in the picture below you can see the exterior boning I was talking about above. 


The header of the Roman Shades are cover with a small valance, that looks like a fold when in place. The valance helps give a polished feel to the Roman Shades and is attached with Velcro (it came that way) 


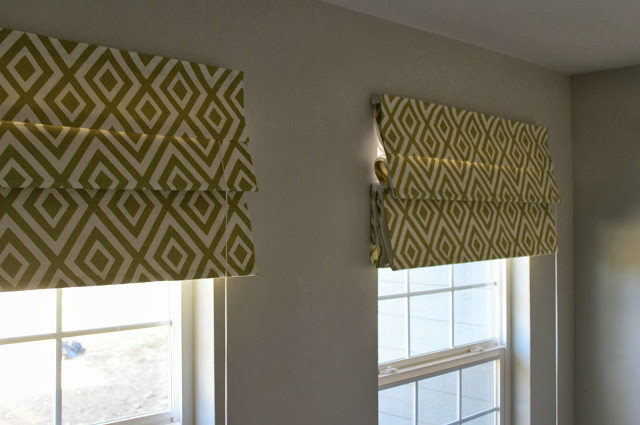
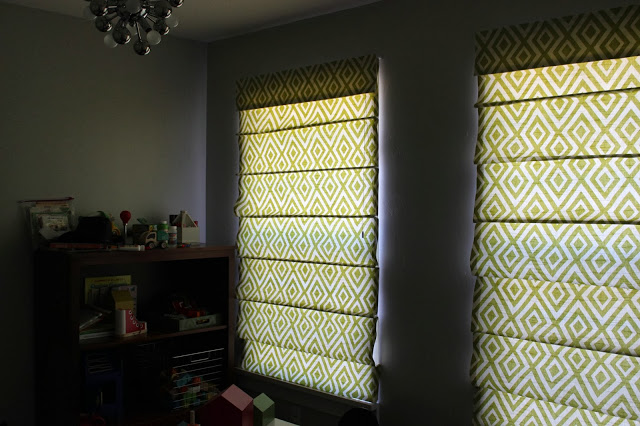
When the Roman Shades are closed they help control light and block out the sun, the original roman shade that I covered up with fabric acts as a liner to the shade helps control the light. 


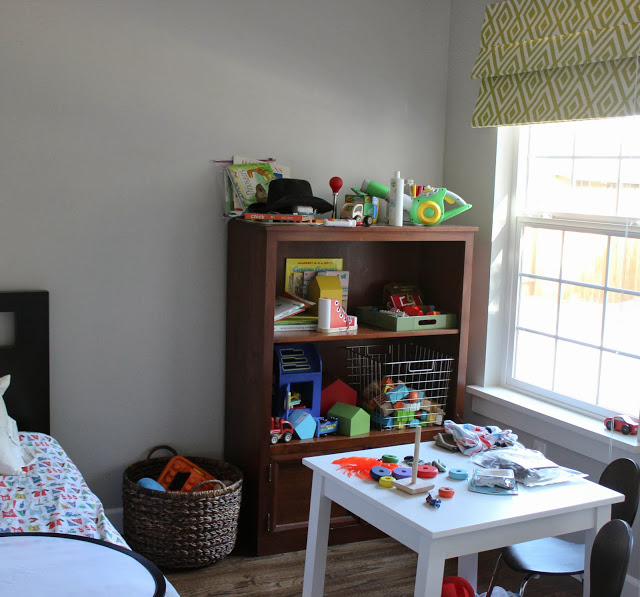
Here's keeping it real picture of Avery's bedroom, toys everywhere lol. I'll share more of his toddler room next week, which still in progress and has needs (storage, storage and more storage & art!)


What do you think of the DIY Customized Roman shades? Big Change over the old blah white ones huh? I have lots more blah Roman Shades around the house that I plan on customizing.


How To Customize Roman Shades 

Toddler Art Caddy

Wednesday, September 18, 2013

One afternoon while shopping in Marshalls I came across a cute pencil caddy and I though it would make the perfect toddler art caddy for Avery. I loved that the caddy was a solid white & spun around and wasn't to big and bulky making it much easier to fill-up  What better way to show all the pretty colors? I bought the caddy for $12 bucks and filled it up with various art supplies all found on clearance at Target & Walmart thanks to back to School supply overload at both stores.


The toddler art caddy is filled with: small and large markers, thin and chunky crayons, glue sticks and colored chalk. Thanks to all the chalkboards people having been making the past few years its so easy to find chalk now! 


I love seeing Avery's little face full of excitement when we spins his art caddy around and around. I even shared a quick video on Instragram of him spinning his art caddy around click here


When we're not creating art together, his art caddy resides out of reach on top of his bookcase! We're practicing using only a few colors at a time and putting them back after he's done. I recently picked up some acrylic paints and brushes and a canvas for Avery since he enjoys painting at pre-school. I plan to have him paint a little 'toddler abstract' for his room, love kid art! I really love the Ikea Mala Art Easel and plan on buying one for his room when he's a little older. 
His toddler room is really coming along, I plan on sharing some pictures of his completed DIY Customized Roman [ no sew] shades on the blog Thursday, still trying to get the perfect shot so you can all see how adorable and nice professional they turned out! 

How do you store your kids art?

Growing Lemons

Monday, September 16, 2013

Whoa last week completely got away from me and I didn't have a chance to blog. The good news is I'm back this week, and have lots to share. Before we moved back in out house in July, I had a vision of having a potted dwarf lemon tree on our front porch and shared even my idea on my Pin of the Week. I thought a potted fruit tree would be such a fun way to greet guests plus add year round greenery [color] on our porch. Last week while in Home Depot we decided it has now or next Spring to but a lemon tree, we ended up going with a Dwarf Eureka Lemon Tree. I read on Garden Guides.com, that Eureka Lemon trees are more of a 'True Lemon,' and almost produce lemons yearlong [Hello Strawberry Lemon Bread! Checkout the recipe here


I found the perfect super large pot for our Dwarf Eureka Lemon tree at Lowes, thankfully it was on clearance. We got the large pit for only $14 bucks! It's made of plastic, but resembles stone, so much easier on our backs if we move it when it starts getting larger. I also picked up a 'Petite Butterfly' plant and bought the medium size version of the large pot too. I love how much color they both add to our house & look great with our chartreuse front door. 


For now the tree is placed under our mailbox, but doesn't interfere with dropping the mail off, so it will stay out for now and then as it grows we'll move it further down. 


We got such a good deal on these pots, I went back and bought two more medium size pots to step on our step outside our french doors.


Even though were still lacking grass in our front yard & back, hopefully our front door feels more welcoming! Do you have any fruit trees growing in containers around your house?

Vintage Find: Dining Room Table

Thursday, September 5, 2013

As you all know by now, I love mixing vintage pieces in our home with new pieces. It just gives our 1950's rancher a more layered look. I love when I'm able to find a fabulous piece that needs love and has a history [makes for a more exciting home] For the past several months, I've been in search of a vintage dining room table for our dining room long before we moved back home, but came up empty handed [I'm so happy I did] 

I was convinced only a round table would be able to fit best in our small dining area which is really our eat-in kitchen, lol. But, after talking to a few different girlfriends of mine, I soon realized we could actually fit a bigger table in our space without making our dining room feel tiny. One of my dearest friends let us borrow her own vintage dining room table to get an idea of the size & use it until we found the perfect one for our space [ yes, my friends are amazing!] 

Seeing her table in our space confirmed that a larger oval table would look amazing in our dining room! It also means we can fit more than four people at a time in our small space, which makes me ecstatic! When deciding on what style table I wanted for our dining room, I knew the table had to be a pedestal table, vintage and not farmhouse style. We had a farmhouse style oak table before and this time around, I was picturing a pedestal base table with more interesting lines. 

 I finally found the perfect table on Craigslist several weeks ago, but only purchased it and brought it home Tuesday night. I know sounds odd huh, well the table is everything I wanted vintage with a pedestal base, but it had three issues that's what took so long to decide if we should buy it or pass. 
  • First: The table was over an hour away one-way [several towns away and a few counties!] I try and keep all my CL purchases within  30mins of our house, just in case the item turns out to be something we don't want. 
  • Second: The seller was selling the table along with six chairs! We already purchased four chairs, so I only really wanted the table. After much back & forth she's wasn't willing to split the set or budge on the price. 
  • Third: The table is not in pristine condition, this vintage table was used, think scratch marks, sharpie makes which all adds up to extra work on my part to 'bring it back to life' & did I already mention she wasn't willing to budge on the price. 
Even with all those 'Buts,' I couldn't get the table out of my head or find one similar that I loved just as much, believe my I looked and looked. Even my sweet girl friend Shavonda was on the lookout for me!! I know, I have great friends!! Day after day I was stalking this table on CL, I was beginning to sound like Sting in his 80's hit, I'll be watching You. I'm sure my friends were tried of hearing about the table and Hasani hearing my obsess over the table! So Tuesday, Hasani drove to pick up the table even though we just got back from a road to LA [check out my Instagram pictures for some fun pictures of our trip down South] Man, I love my husband!! Wow, I made you all read a lot before sharing pictures of our new to us dining room table. Below is a picture of our new table via CL seller.


Here's our vintage table in our Garage ready for its makeover [Ignore the garage mess, my plan is to start organizing our garage soon and get rid of a lot of empty boxes in there!] I plan to start working on this project Friday night! The previous owner had the table and chairs for twenty years, its made of blonde wood. 


I love the curvy legs on our new dining table, they are so unique and pretty. The feet have brass caps on the bottom, that are a little beat up. In the below picture the leaf is taken out. After the table is refinished, we plan on using the leaf in the table. 


As you can see, there are plenty of areas on the table where the old finish is completely worn off the blonde wood. 


I can't get over how much I love the lines on this table!! 


While I was checking out our table on Tuesday evening, I saw this written on the back of the leaf. I'm guesses its the date the table was made! The table is three years older than our house, so its the perfect fit for our little rancher! 


As I mentioned earlier we inherited six chairs with our new to us table, and even though we don't need six chairs, since we have four other dining room chairs. I love these chairs! They are in fantastic condition and all have the original green vinyl fabric on the seat. Two of the chairs have arms and the four don't. I have plans for these chairs, which I'll share later. 


As for the table makeover, my plan is to paint the table a high gloss white. Our new four chairs we recently purchased are a deep espresso finish, I think they will look fantastic paired with our vintage table. In the future we'd like to add a banquette seat in our dining room, allowing us to seat six! Here's some links to recent table makeovers, that I heart all using white paint! 

A Bubbly Life - White Dining Room Table 
A Home Full of Color - Oil Painted White Dining Room Table 
Living Savvy - Enamel Painted White Dining Room Table
Centsational Girl -  Painting a Kitchen Table White


I can't wait to get started!! What do you think of our new vintage table?

Life Via Instagram: August

Wednesday, September 4, 2013

Wow is August really over? August was such a fun and busy month: we relaxed more into our home, spent the last few weeks of Summer enjoying 3D Movies, Drive-in movies, quick yummy dinners, our oldest started 8th grade [I know crazy] and spend a weekend in Los Angeles seeing the sights and riding rides at Universal Studios. In addition I finally finished our Campaign Dresser & shared our mini dream kitchen, and began working on Avery's Roman Shades. I started doing monthly Instagram roundups to help remember all the fun moments the month was made up of. Feel free to follow me on Instagram @mrsclh


Row One: Eating Sushi with Hasani // I started using coconut oil on Avery's hair to lock in the moisture and keep is ends from tangling [so far so good] // I love this brand of syrups, I started using for making Homemade Lattes

Row Two: Took a mid-week vacation day and treated my kids to a 3D movie // Hung one of Avery's DIY customized roman, love the results so far // Shopped at the farmers market during my lunch break 

Row Three: Visited the famous TLC Chinese Theater // Road Tripping to Los Angeles // Avery & Daddy having a blast jumping over bus benches in Hollywood 

I love all the memories we made in August! Such a fun month, lets hope September is a productive DIY month around here, we just brought home a vintage dining table from the 50's along with 6 chairs!! I'll share the before on Thursday!

How was your August?

You Make Also Like

Related Posts Plugin for WordPress, Blogger...