
#Swap It Like Its Hot: Flea Market Swap

Monday, September 29, 2014


Morning friends! I teamed up with a slew of creative bloggers swapping flea markets finds and then making them over. Here's the deets, shop [items from a flea market, thrift store etc] for a fun item for another blogger to makeover, spending between $10-15 bucks and then send them the item and they get creative making it over. My Swap buddy was Yvonne from Stone Gable, she sent me a pair 100 year old baseboard molding. 


To be honest, I was a little stumped with what to do with them. My first thought was no to touch, and showcase them by making a shadow box. Then, thought about turning them into self brackets to hold a shelf. Still stumped, I called in for reinforcements and asked my friends what they thought. Some friends thought bookends, shelf brackets, kids blocks, then Shavonda suggested stacked wood block candle holders. Thanks to her, I had a light bulb moment!! I loved the candle holder idea it made perfect sense, I decided to cut them down into into wood blocks and turn them into tea light candle holders. 


I bought some tea lights from Target and a 1 1/2 inch drill bit to drill into the wood. I decided to cut down the baseboard wood into 3x3 inch pieces using my miter saw. 


I'm not a 'chippy wood' kind of girl, so I decided to using the backside of the baseboards to drill my tea light candle hole into. To drill the hole into the block of wood, I used a the clamp on my Miter Saw to keep the wood held in place and wore protective glasses. Remember its very important to wear protective eye wear,especially while drilling a circle into wood. Next, I marked an X on the wood and I used my Ryobi impact drill to make the hole in the wood and drilled into the wood. After I finished drilling the holes into the pieces of wood, I sanded the blocks and all the edges down to make everything more smooth. I also left some of the edges raw and untouched.


I planned on leaving the wood untouched, but the wood appears to be cedar and had sections of sap in it, that made it soft. For that reason, I decided to lightly stain the wood with walnut stain. I'm really happy with how my little tea light candle holders turned out, each one is unique and imperfect, love that none of them turned out identical. And now for the after, below. 


The tea lights don't sit all the way into the wood, due to the depth of the wood blocks plus it also makes it easier to remove them. 


I'm thrilled with how my Swap It Likes Its Hot project turned out, especially since I was originally stumped by what to do with the old baseboard molding. My swap partner was Lindsey from Makley School for Girls, make sure you pop over to her blog and see what I sent her plus, see what she did! I can't wait to head over there too! 

Also stop by the blogs below to see what my fellow talented blog buddies where up to with there projects! This is going to be a fun day, so looking forward to popping over to all the other blogs. Plus its always fun to discover new to me blogs! Also quick and huge thank you to Charlotte of Ciburbanity & Jessica of Gourley Girl & Guy for thinking up this one Swap Party idea and asking me to join in the fun!! 

2 Little Superheroes AKA Design A Chic Little House The Chronicles of Home Ciburbanity Decor Adventures Desert Domicile Finding Silver Pennies Gourley Girl & Guy The Happier Homemaker Hearts and Sharts A Home Full of Color Makely Home Making Lemonade My Passion For Decor Primitive and Proper Queen of Everything Rooms For Rent Shades of Blue Stone Gable Thoughts From Alice</ a> Town and Country Living Two Purple Couches While They Snooze</ a> White Buffalo Styling Co. Windgate Lane 

Quick question, how do you think my project turned out? If you received the 100 year old baseboard molding, what would you have done? Can't wait to hear your thoughts! 

Color Crush: Navy

Thursday, September 25, 2014

I love almost every single color on the color wheel and one I'm smitten with is Navy. Navy is one of those rich colors that look so good in almost any room in your house. Here's a few ideas to incorporate Navy in small does in your home. 

1. 2. West Elm Navy & White Strip Shower Curtain 3. Pillows: Etsy Seller SamanthaEmma Navy PillowEaster Pillow, Etsy Seller SukanPillows Navy Pillows 4. West Elm Ironwork Flocked Curtain 5. Etsy Seller Flourish Jane Austen Quote  (love this Jane Austen quote

Loving how this these living rooms below used a strong Navy presence to decorate the space, using the color on the floor to pillows and more.

Image via Pinterest 

Image via Pinterest

Image via Pinterest

Are you crushing on the Navy too?


Bedside Lamps or Swing Arm?

Monday, September 22, 2014

I love getting comments from all of your about how we live in our home and ideas on switching things up etc. I recently received a comment, suggesting I consider switching out my bedside table lamps in favor of swing-arm lamps to give us more room on our nightstands + work well with the visual height of our headboard. I loved the suggestion and loved the look of swing arm lamps, but can't part with my beloved Ralph Lauren lamps. I bought for only $8.00, plus I'm a sucker for over-sized lamps. Click here for a  quick reminder of how my nightstands and lamps look in my bedroom. Right now, their too near and dear to my heart to part with, but you never know what the future holds! 

The question got me thinking of bedrooms with lamps and bedrooms with swing arm lamps, lets take a look at some pretty inspiring bedrooms shall we of bedrooms with both styles. First up bedside lamps on nightstands in all shapes / sizes / styles.


Image via Pinterest

Image via Pinterest
Image via Pinterest

Now for some lovely bedrooms with swing arm lamps, both traditional shapes and grand ones. 


Image via Pinterest

image via Pinterest 
Image via Pinterest

Image via Pinterest

I'd love to hear your thoughts, What style do your prefer for your bedroom? Bedside table lamps or Swing Arm Lamps, and why?

My Must See TV

Thursday, September 18, 2014

It's already Mid-September, which means its already time to gear up for Fall TV. I'm excited for my favorite TV shows to return and hoping to fall in love with some new ones. As most of you know, we're cable free and watch our TV with our Roku, so I'm always watching shows a few days later. Or binge watching a couple of shows at a time [one of my favorite late night past times] Read more about our decision to cut the cable cord here, here and here!

Here's a quick round-up of the shows, I can't wait to catch up on and see what my favorite characters are up to, from plotting revenge, winning cases, finding love, dealing with scandals, killing zombies and writing songs. 
Revenge: I'm currently catching up on episodes I missed on season three, love Emily Throne and all her plots at revenge against the Graysons. Sleepy Hollow: Yet, another show I love watching, but totally hope to catch up on missed episodes. The Good Wife: I'm a huge fan of this show! The acting is suburb, if you haven't watched it yet, check out past seasons on HULU or Amazon Prime. The Mindy Project: I never though I'd be a fan of the show until, Hasani mmentionedwe should watch it, well I stayed up many nights way too late laughing and falling in love with this show! Mindy Kaling is crazy funny, and i even starting following her on IG! Scandal: Three words Olivia Pope + Gladiators, if your not watching this show, you need to be, trust me! The Walking Dead: I'm obsessed with zombies, we watch this show though Amazon Prime since its not on HULU. Nashville: I watched an episode or two on the whim last year and was quickly hooked on the drama in Nashville starting its country singers and songwriters. Goldbergs: This hands down is one o my favorite shows to watch with my oldest Tabari, the comedy is set in the 80's so think The Wonder Years 80's edition. Oh, I should mention this is totally my short list, since I can't add the return of Downton Abbey until January 2015. 
Every fall there are so many new shows and just as your getting hooked the network seems to always decided to cancel the show, so it makes it so hard to get into new shows. Here are a few show, I'm looking forward to checking out: State of Affairs, Madam Secretary, Utopia, How to Get Away with Murder and Black-ish 

I'd love to hear what's on your must see TV list for returning shows? And what new shows are you looking forward to checking out? Any shows I'm not watching that I need to check out? 

Sage Living Wall Giveaway

Wednesday, September 17, 2014

Happy Wednesday everyone! I'm super excited about today's giveaway, I've teamed up with my friends at Sage Living Wall to give one lucky reader of Chic Little House there very own living wall. Click here to check out my Sage Living wall succulent garden, that I shared yesterday.  

The winner of the Sage Living Wall gets their choice of a 10x10 garden: Succulent, Herb or Fern. Each living wall comes with plants and frame. The frame can easily be hung on the wall, placed on a table as a centerpiece or placed on the stand for your mantel. I loved the look of the living wall in my kitchen, it really brightens the corner of my kitchen up. One of the things that makes the Sage Living Wall so unique is the living walls are soil free making them easy to water and keep green yearlong. 


Hop over to Sage Living Wall to select your favorite and then enter to win below. The giveaway is open to US Residents only, starts 9/17 ends 9/23/14. Enter below.

a Rafflecopter giveaway

Sage Living Wall in my Kitchen

Tuesday, September 16, 2014

I've loved the look of living walls both indoors and outdoors, and have seen various DIY versions which looked difficult to build, heavy and hard to maintain. Plus, keeping the soil actually in the garden wall looked complicated as does trying to watering them. I was recently introduced to Sage Living Wall, a Chicago based company that specializes in large indoor wall gardens in restaurants. They've recently expanded to make their product more accessible to people who want to add garden walls in their home or business on a smaller scale. They've create 10x10 framed vertical gardens cartridges in either herbs, succulents or ferns. One standout feature of Sage Living Wall is instead of using soil, their product uses 'rock wool,' which helps retain moisture between watering.

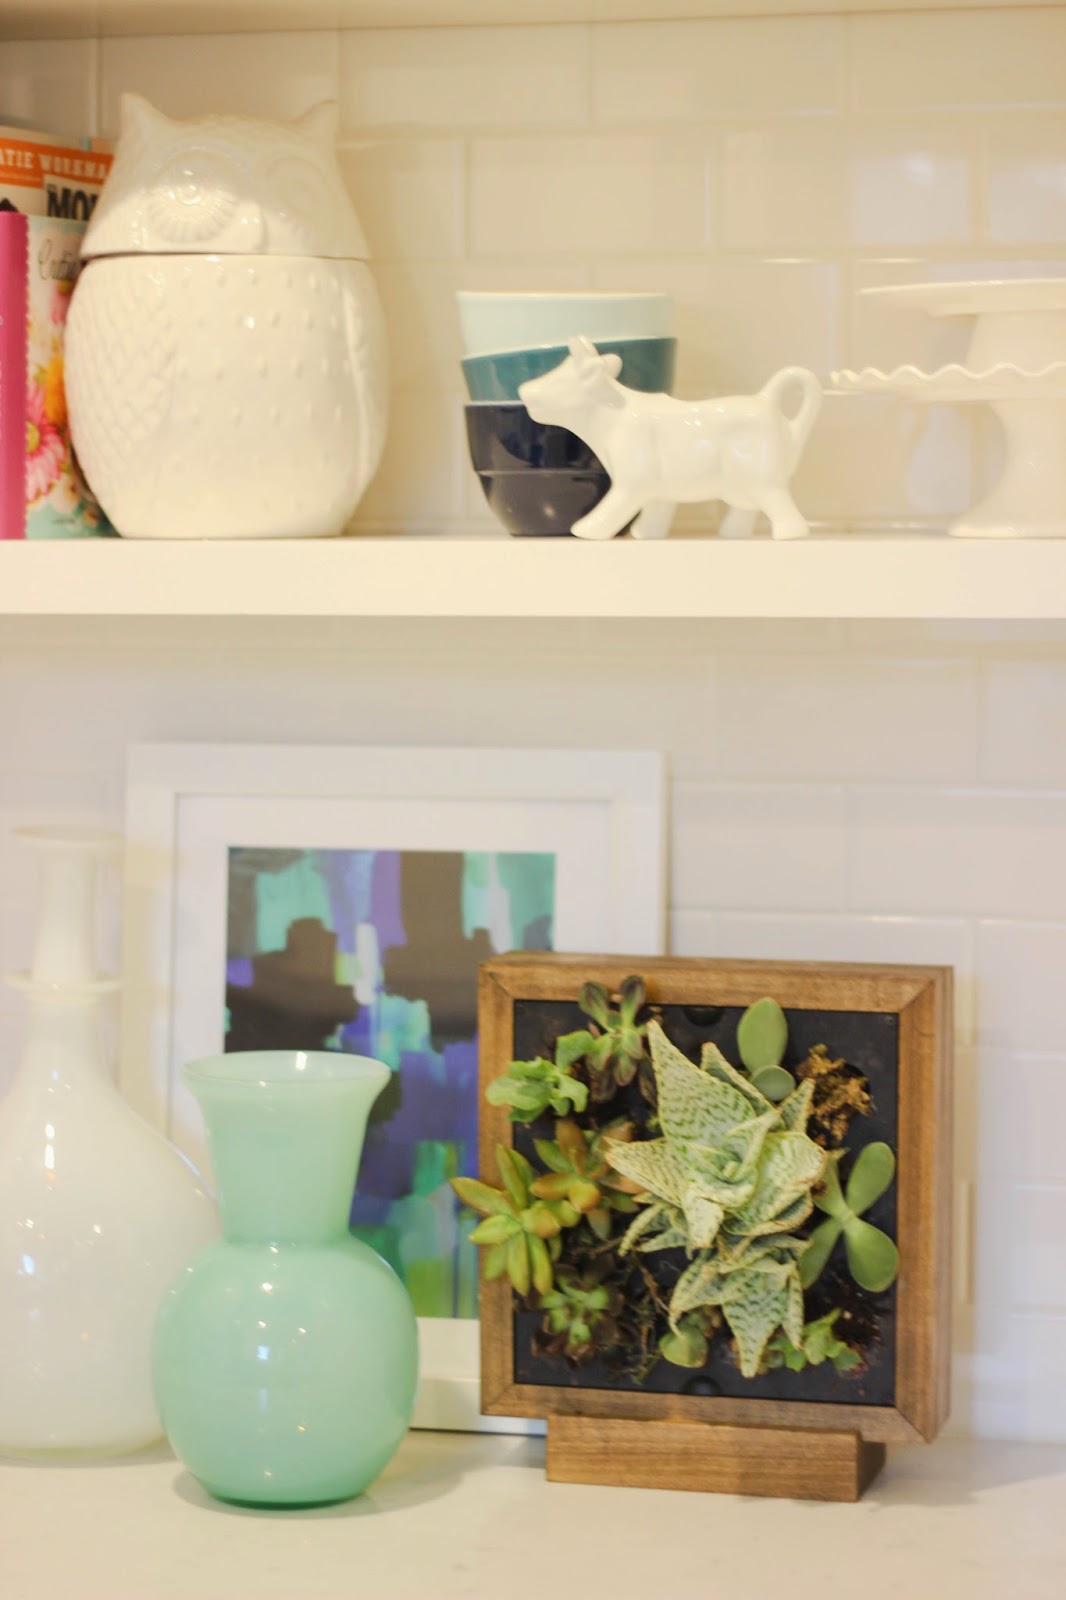
Sage Living Wall sent me a 10x10 framed garden to try and in my home, and give won away to my readers! Very nice of them right! I love the ease of succulents and decided on a succulent garden for my kitchen. Sage Living Wall frame can be hung on the wall, placed vertically on a table as a centerpiece or placed on a frame. I love the modern look of placing the garden on the frame on my kitchen counter. 


I love the wood frame the cartridge sits inside, the warm wood tone along with the succulents are a happy edition to my home. I know as the plants continue to grown in its going to look even more amazing. 


I've had my garden wall for a few weeks and per instructions on Sage Living Wall, I water my plants every 10-14 days. To water my plants, I simply remove the cartridge from the wood container and place the cartridge in the sink and water the opening side.


After watering my garden, I wait around 15-20 mins then I place the cartridge back inside the frame. 


I'm loving this new addition in my kitchen! Make sure you stop by Wednesday and enter for a chance to win your choice of a Sage Living Wall 10x10 Garden in either herbs, succulents or ferns. 

PS:My friends over at Sage are giving Chic Little House readers 10% off purchases from 9/16-9/21/10 use code CLH10 at checkout.
What do you think of indoor garden walls?


Refinished Vintage Lane Nightstands

Sunday, September 14, 2014

I recently shared the vintage Lane night stands that I bought on Craigslist for $25 each, along with the importance of using primer especially on vintage furniture. I'm happy to share that our nightstands are done and they turned out amazing. Click here for a reminder of how my bedroom looked, last time I shared it on the blog. Our vintage nightstands before their makeover. They had a poor streaky chip paint job and where super dirty. 


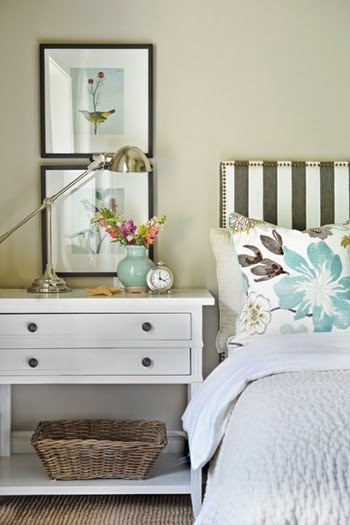
After cleaning the night stands, sanding and priming them, I applied three coats of Behr Ultra Pure White with a semi gloss finish. I knew right away after seeing them on CL, I they would look so good painted a bright crisp white. When I first shard the nightstands, I was thinking of updating the hardware, but decided against it. The original hardware just goes so well.The funny thing is in decor, I'm not really a 'gold girl' even though its of the hot metals, I keep finding vintage pieces that have gold hardware. For example our campaign dresser, the vintage pair of Ralph Lauren lamps and the brass feet on our dining room table. I love how the nightstands turned out [I'm still deciding on the right picture to go in the frame]


One thing I love about the new nightstands is their size, while their  little shorter than our old ones, they're the perfect size. Thanks to their depth, our lamps comfortably fit along with a picture frame, books, a small vase and jewelry box etc. It already feels like a huge happy upgrade for our bedroom. I fell in love with this jewelry shadow box from West Elm, which is just the right size for me to keep the jewelry I wear most often close.  


Our benches normally sit in our nook area of our bedroom, but there we too pretty to leave out of the shot. We're thinking of some bedroom layout changes, sharing more below. 


I'll share some full room shots very soon [including my husbands side], we're still deciding on art for both sides of our nightstands, to go above our lamps [for now I removed what we had there] We're also thinking about shifting a few things around our in bedroom, possibly moving switching up our dresser and benches. I'm also in limbo about our console table, not sure if I'll stain the wood walnut or pain it white decisions decisions. 

What do you think our of refinished nightstands?

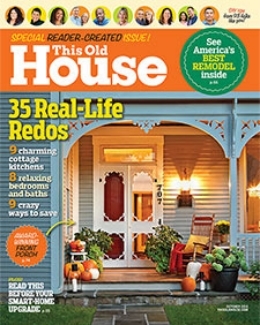
Tour My Home in HGTV Magazine

Wednesday, September 10, 2014

I'm have some super exciting big news to share that's making this girl walk on cloud nine, even ten if that saying existed. My house, pretty much the entire house is featured in the Hours Tours section on HGTV Magazine October 2014 issue!!! I've been wanting to share this exciting news for months, every since the photo shoot at our home in late June happened, but I was sworn to secrecy and not even allowed to hint, tweet or even Instagram a hint! Talk about tough, since by nature I'm a self proclaimed sharer. We're in the issue below, isn't it a dreamy issue to be apart of! 


If you follow me on IG then you may have seen me mention the exciting news over there. Funny story, I had no clue issue was out on the shelves until my girl Lakietha of Wrist Soiree tagged me, letting me know she spotted me and my family in the latest issue on HGTV Magazine. Cue, my total Cali girl reaction saying OMG at least a dozen times! 
Three stores later on Saturday, Hasani and I finally found the issue at Barnes & Noble! Later that evening after sharing the news on Instagram, I finally read the article had a rush of a emotions. The article in HGTV Magazine shares the story of our house fire in July 2012 along with the year long rebuilding process and floor plan changes we made. Mostly my emotions where about being grateful that my family was unharmed in the fire and we only lost belongings. 

I'm so grateful for my readers, always having encouraging words for me and uplifting my spirits when I was at my lowest. Sweet comments or just sending my a 'hi' email meant and still means the world to me. For me blogging has always been my creative outlet and it really helped me even more during the rebuilding phase, being able to share all the excitement and to rebuild our home and love it back to life. As most of you know, I really dove head first into making sure our home was exactly how we wanted it while working within our budget. From making sure we used every square inch of kitchen layout in wise way, to determining where outlets and light switches should go. I'm so thankful we found an amazing contractor 'who got our vision' I loved working his team and rebuilding relationships with all the sub-contractors too! We've spend the past few years rebuilding our lives due to the fire, rebuilding, settling in our home and now sharing our story beyond my blog and with the readers of HGTV Magazine. Now let's take a little peek inside. 


I'm working on post about all the behind the scenes details about the 3 Day photo shoot: sharing how they found me, a birthday celebration we had during the photo shoot, how sweet Jennifer Berno from HGTV Magazine is, how much I enjoyed stylist Elizabeth Demos who was sweet enough to share a bit of though process and course what an amazing photographer Lisa Romerein is! It was such a fun shoot, full of full laughter and great conversation and exciting insight into the entire process. I enjoyed every minute of it! 

Now run and go get yourself a coffee and curl up with the October Issue of HGTV and There's so much more to see and of course read in the magazine! I can't wait to hear your thoughts and hope you love our home as much as we do! 

Have you picked up the October issue of HGTV? 

Bathroom Vanity Refresh

Tuesday, September 9, 2014

When we bought our bathroom vanity last year for our master bathroom addition, I knew I wanted to paint it. I love the lines of it, the deep bottom shelf, would provide lots of storage. I like everything about it except the hardware and existing color! We lived with the original color for over a year, looking for the right color. I recently found the perfect color to paint our vanity Coastal Storm MQ6-20 by . I've used other Behr® paint colors in our home (most recently painting the interior of our front door) and couldn't wait try out the this new interior paint + primer. Along with Wooster® Behr®   and Behr® paint, I used ScotchBlue™ Painter’s Tape for delicate surfaces, which is perfect to use on cabinets. I recently fell in love with Wooster® paint brushes last year while painting my campaign dresser. To achieve a smooth finish on my vanity, I used Wooster® Pro Nylon / Polyester paint brush. 

My bathroom is super small at least for taking pictures, so it can be tricky to get a good full shot of my bathroom. Here is my bathroom vanity before. You can already tell the finish is so not me, right?


I used the ScotchBlue™ Painter’s Tape Painter’s Tape to tape off the legs around my vanity and along the wall. I also taped under the vanity cabinet and counter. Taping the walls that my vanity touches is a super time saver and allowed me to paint without have to worry I paint bump the walls with my paint brush.


I cleaned my vanity with soap and warm water, then I lightly sanded the vanity before I began painting, then wiped away any dust reside with a lint free cloth. The paint color is such a pretty shade of grey with no blue undertones, it went on very smooth.  

I decided to use a brush to paint out the entire vanity and loved the coverage one coat gave. I opted to let the first coat completely dry for 24 hours and then applied another coat. 
                                                                                                                                                                 

I waited a few days before installing the hardware back on. I found some hardware on The Home Depot website that I plan on ordering and then our bathroom vanity will be done. I'm completely in love with how the vanity turned out! The color looks so good and the coverage nice smooth. Here's my vanity now.


I can't wait to share an update on my vanity once our new hardware arrives! Our bathroom vanity now feels so much more like us, and looks like an entirely new vanity. I love the power of amazing paint + great paint brushes + ScotchBlue™ Painter’s Tape!

What do you think of our bathroom vanity refresh so far? 


This year’s summer blog-hop is called “Get It, Got It, Go” and is being hosted by Kate at Centsational Girl, so be sure and check out the other fabulous projects.                                                                              
320 Sycamore: Front Porch Project Simply Designing: DIY Board & Batten Brooklyn Limestone: Farmer's Market Display Stand Fave Crafts: DIY Aztec Planters Domestic Imperfection: Rusty Metal Shed Makeover Studio Pebbles: Faux Frame Modern Art Whipperberry: BBQ Tool Storage Dukes & Duchesses: Color Block Umbrella Table "Get It, Got It, Go" Summer Blog Hop
I am proud to be a 3M, Behr®, and Wooster® - sponsored blogger, and, as part of my responsibilities, I get the opportunity to evaluate products. Opinions are my own and additional product used in the project were selected by me.     

                                                                                                                                                                                     
Behr® Paint ScotchBlue™ Painter's Tape Twitter ScotchBlue™ Painter's Tape Pinterest The Home Depot Facebook The Home Depot Twitter

You Make Also Like

Related Posts Plugin for WordPress, Blogger...