If you follow me on Instagram then you may have already seen me sharing a few pictures of my recent fabric shopping trip. We spent the weekend celebrating my husbands birthday in Reno, NV with our kids which meant lots of pool time, and Circus Circus time. While there, my husband was sweet enough to drop me off at a fabric store called Home Fabrics for about an hour, giving me time to wonder though the many designer fabrics that they sell at steep discounts We used to have one in Sacramento, where I picked up this fabric for our dining room drapes. Below is the fabric I picked up! The first fabric is from West Elm, called Honeycomb in the colorway Horseradish, I picked it up for $7.99 per yard. The floral pattern is so pretty, it was on clearance for $3.00 a yard! The turquoise and orange matching fabric is from Serena and Lily called Diamond fabric, again paying only $7.99 per yard. The blue tigerish fabric was also a bargain for only $7.99 per yard.
Now that you've seen my fabric buys, its time to share my fabric plans. First up the Honeycomb fabric is going to be turned into fun kids project, I've been wanting to make for years! This fabric inspired me to finally pull the trigger. Once I complete the project, I'll share for now keeping that one under wraps. The floral fabric, I plan to use outside for an upcoming party we're having at our home, think table runner etc. The turquoise fabric will become one or two pillows for our living room sofa. I'm also planning to use the tigerish fabric as a lumbar pillow on our sofa to break up all the squares one we have on it now. I plan on recovering our bench in our mudroom / laundry room with the Diamond fabric! The little bench in our mudroom could totally use happy dose of color and I think this is the perfect fabric to do the trick.
Have you come across any amazing fabric finds recently? Any guesses what I plan on doing with the Honeycomb fabric?
Fabric Finds


Thursday, July 24, 2014
This is one of those pinch me moments! I was recently asked to participate in the inaugural edition of The Home Depot Style Challenge Summer Games edition. For me this is huge, I'm the girl who likes walking the aisles of Home Depot on Fridays, that's my type of fun. The challenge material was: wood, metal or PVC. Once you received your challenge material, the goal was to create a game. My challenge material was to create a game using PVC pipes. I came up with the idea of making bowling pins from PVC. I wanted to game to be interactive, colorful and fun for all age groups.

Head over to The Home Depot Apron Blog, to see how I used PVC pipes to create bowling pins. In addition my husband and I also built a hanging chalkboard to keep score! The game was lots of fun to create, but was even better watching my family have fun on our back yard playing and knocking over those PVC pins. Also check out the other amazing creative games my fellow Challengers came up with! Hope to see your comments and thoughts on The Apron Blog!
Head over to The Home Depot Apron Blog, to see how I used PVC pipes to create bowling pins. In addition my husband and I also built a hanging chalkboard to keep score! The game was lots of fun to create, but was even better watching my family have fun on our back yard playing and knocking over those PVC pins. Also check out the other amazing creative games my fellow Challengers came up with! Hope to see your comments and thoughts on The Apron Blog!
Tuesday, July 22, 2014
For the past several months, I've been contemplating buying roman shades for our living room, dining room and master bedroom.When we moved back into our home a year ago, we decided on a combination of Roman Shades and faux wood blinds throughout our home. Along with my girlfriends help, I recovered ready made roman shades with fabric transforming them into custom roman shades for Avery's room, our kitchen and master bathroom. I love custom look the roman shades gave our rooms, I have plans to recover Tabari's basic roman shade, once he approves fabric! I actually just ordered a few fabric swatch contenders and can't wait to see what he chooses!
I feel that bamboo roman shades add so much warmth and texture to shared living spaces and look amazing layered under draperies. Here are a few examples of bamboo shades, I'm totally smitten with.
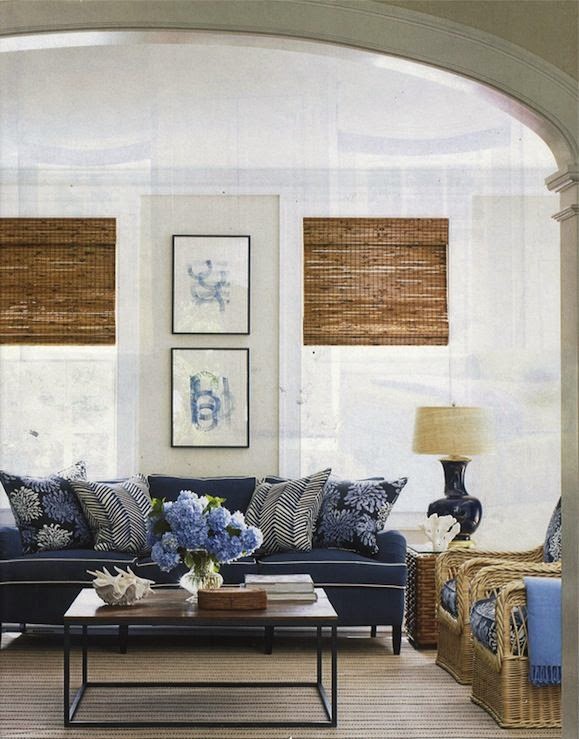
I feel that bamboo roman shades add so much warmth and texture to shared living spaces and look amazing layered under draperies. Here are a few examples of bamboo shades, I'm totally smitten with.
via Decopad
via Decorpad
Since bamboo lined roman bamboo shades can be very pricey as most custom window treatments are, my plan is to be in stock shades and add privacy lining to the back of the roman shade. The lining would help give them a more finished look, while controlling light when closed. While I love the ease (light filtering, privacy etc) of our current setup of blinds on the windows mentioned above, they're also cumbersome and heavy and give off a sterile vibe. The exact opposite of what bamboo shades give. I'm the type of person who loves having their windows and blinds open all day letting fresh air inside and natural light, but since our blinds are so heave to raise, I find myself only opening them. Plus once the blinds are fully raised they stack super thick. I keep going back and forth between making the change to roman shades, or sticking with what we have.
For now, I'll keep pinning lovely images and be on the lookout for well made bamboo shades that I can customize.
Which type of shade do you prefer in your home? Mini blinds, Vertical Blinds, Faux Wood Blinds or Roman shades? And why?
Thursday, July 17, 2014
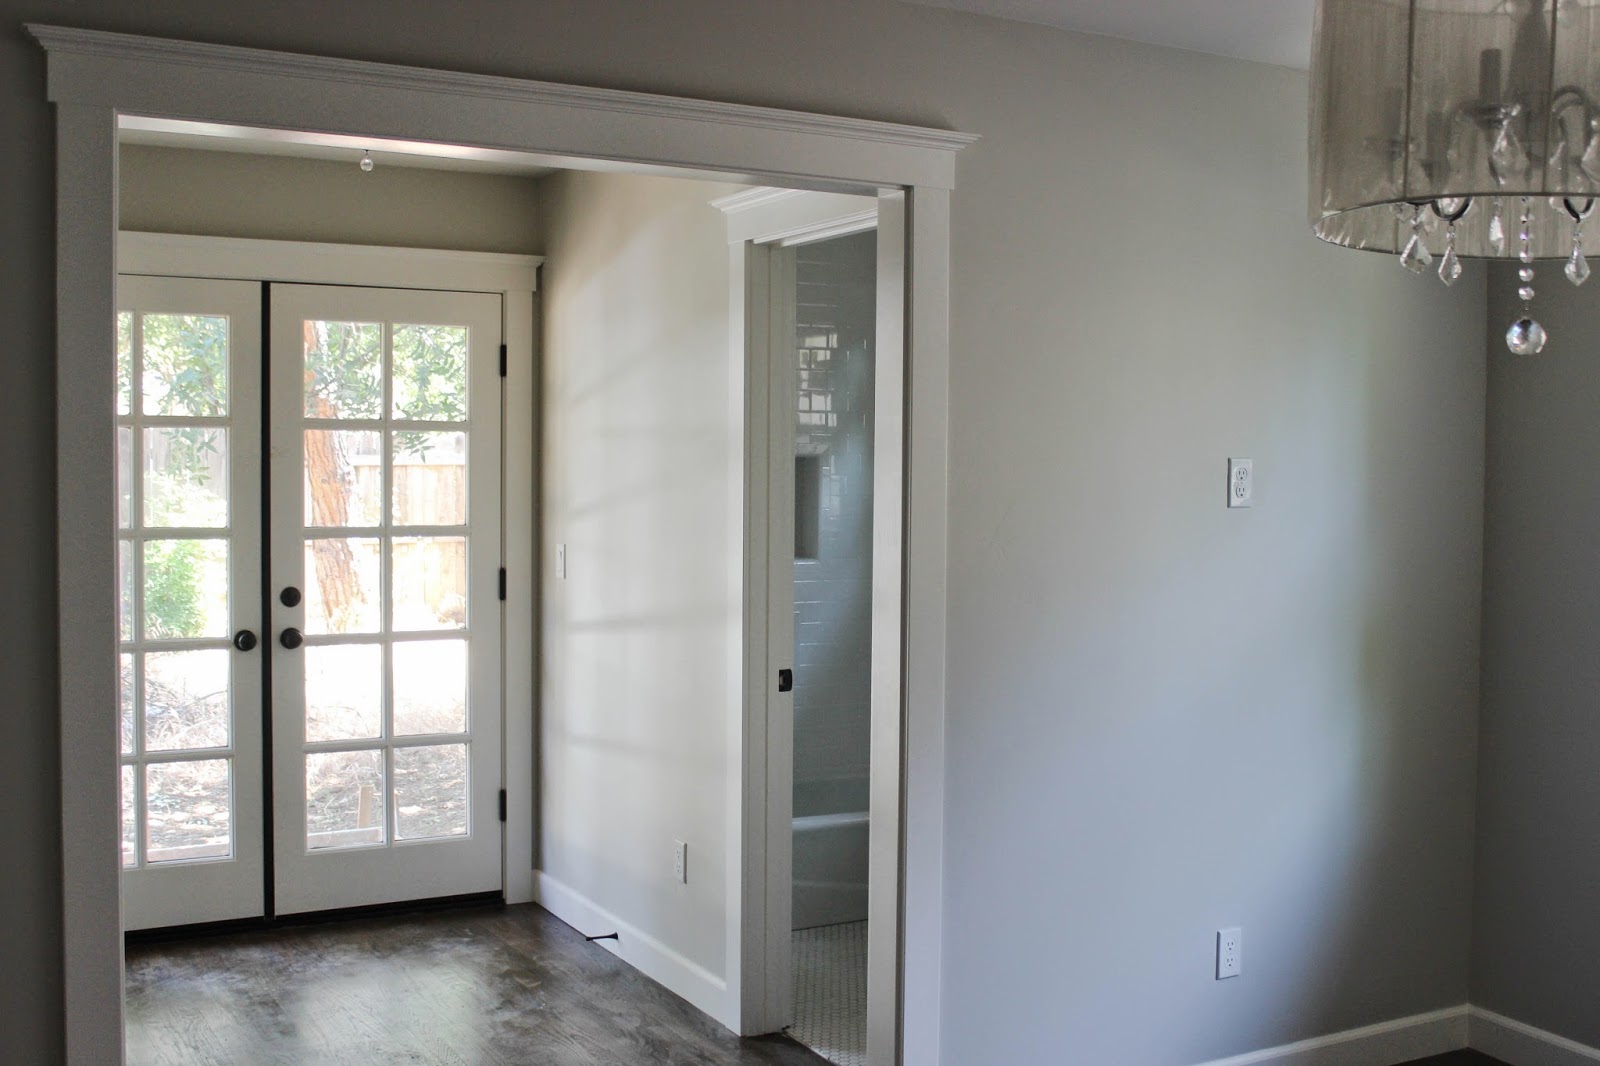
For the past year, I've been picturing a console table in our bedroom where our french doors are. I really want the area between our walk-in closet and master bathroom to have purpose and feel apart of bedroom. Here's a picture of the space, right before we moved back in our home last June.
Here's a few stylish console table vignettes I adore, exactly the look I'm going for in this small space. A spot to hold a pretty lamp, books, artwork, flowers and additional storage.
After looking for a petite console table to fit in our space for close to a year, I finally came across one from JCP. We bought the Design by Conan marbled console floor model table on clearance and used a coupon bringing the table down to $160.00. The style is perfect for our bedroom, a mixture of modern lines and classic marble top. I promise to share more pictures of our new console table, once its tweaked a little.
While I love the table, I know I'll love it more once the lower half oak color is stained a darker color. I think by staining the color a deeper shade, it will flow much better in our space. I'm inspired by the Nash Console table from Crate & Barrel, I love the marble top which is super similar to the one we found, and I love the dark stain on the bottom of the table.
I plan on tackling our console table project this weekend and sharing all the deets on Monday.
Do you alter new items to fit your space? If so, please share the link, I'd love to see!
Here's a few stylish console table vignettes I adore, exactly the look I'm going for in this small space. A spot to hold a pretty lamp, books, artwork, flowers and additional storage.
via Pinterest
via Pinterest
After looking for a petite console table to fit in our space for close to a year, I finally came across one from JCP. We bought the Design by Conan marbled console floor model table on clearance and used a coupon bringing the table down to $160.00. The style is perfect for our bedroom, a mixture of modern lines and classic marble top. I promise to share more pictures of our new console table, once its tweaked a little.
While I love the table, I know I'll love it more once the lower half oak color is stained a darker color. I think by staining the color a deeper shade, it will flow much better in our space. I'm inspired by the Nash Console table from Crate & Barrel, I love the marble top which is super similar to the one we found, and I love the dark stain on the bottom of the table.
One thing I've learned over the years I've been DIYing, is to not be afraid of changing a piece of furniture to meet your needs, even if the furniture is brand new. My end goal, is to create a home my family and I absolutely love, so don't be afraid to change furniture, pillows, drapes etc to fit your style.
I plan on tackling our console table project this weekend and sharing all the deets on Monday.
Do you alter new items to fit your space? If so, please share the link, I'd love to see!
Wednesday, July 16, 2014
I spent part of last week in Atlanta, attending the Haven Blog Conference with my girl Shavonda from A Home Full of Color (hence not getting a chance to blog). I had a the wonderful opportunity to meet so many amazing creative, intelligent, kindhearted bloggers, I've been reading for years in person! I plan on doing a quick recap of my Haven experience later this week.
By nature, I'm a sharer and that's one of the reasons I decided to start a new series on my blog simple titled My Favorite back in May. I love sharing things in my life that make me happy: good food, great drinks, the perfect workout playlist, yummy deserts, best paint colors and pretty much anything under the sun will be my topic of choice.
One of my favorite spots for artwork in my home is my kitchen. I love the color, creativity and personality it brings kitchens. Since I spend many hours during the week cooking, baking and cleaning in my kitchen. I like to artwork that makes me smile. Artwork can simply be placed to to lean on against your kitchen back splash, hung on walls, above your stove, on open shelves the possibilities are endless. you may remember, we decided to hand artwork above our stove, and yes I have to clean up any splatters that get on the frame or glass but I don't mind.
Here's a round up of Etsy shop with lovely artwork to add color into your kitchen.
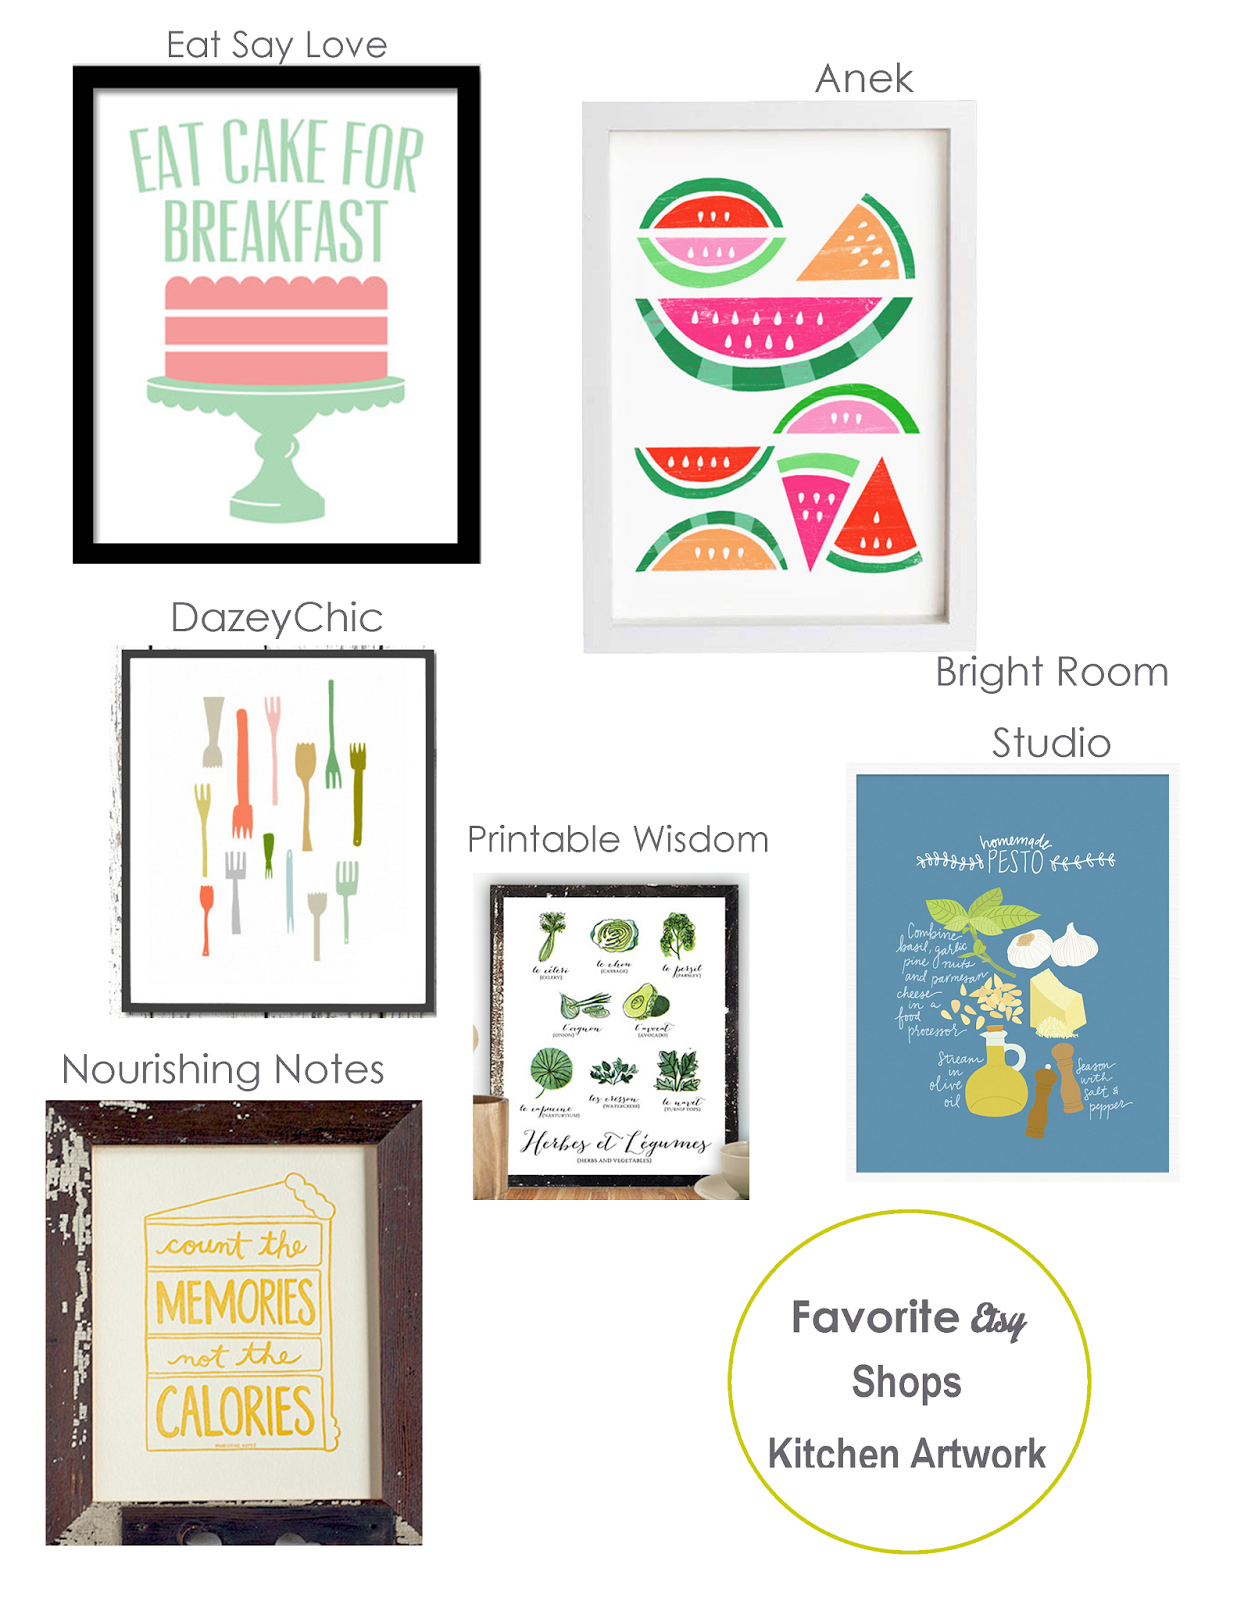
Here are the links to my favorite Etsy shops for kitchen artwork: EatSayLove, Anek, DazeyChic, PrintableWisdom, BrightRoomStudio and NourishingNotes
Did you know you can follow people on Etsy just like you can on IG & Pinterest? Follow me on Etsy here.
Do you add artwork in your kitchen?
By nature, I'm a sharer and that's one of the reasons I decided to start a new series on my blog simple titled My Favorite back in May. I love sharing things in my life that make me happy: good food, great drinks, the perfect workout playlist, yummy deserts, best paint colors and pretty much anything under the sun will be my topic of choice.
One of my favorite spots for artwork in my home is my kitchen. I love the color, creativity and personality it brings kitchens. Since I spend many hours during the week cooking, baking and cleaning in my kitchen. I like to artwork that makes me smile. Artwork can simply be placed to to lean on against your kitchen back splash, hung on walls, above your stove, on open shelves the possibilities are endless. you may remember, we decided to hand artwork above our stove, and yes I have to clean up any splatters that get on the frame or glass but I don't mind.
Here's a round up of Etsy shop with lovely artwork to add color into your kitchen.
Here are the links to my favorite Etsy shops for kitchen artwork: EatSayLove, Anek, DazeyChic, PrintableWisdom, BrightRoomStudio and NourishingNotes
Did you know you can follow people on Etsy just like you can on IG & Pinterest? Follow me on Etsy here.
Do you add artwork in your kitchen?
Monday, July 7, 2014
Hi friends! It's hard to believe its been a month since my last blog post! June has truly been a whirlwind month, filled with two birthdays and two behind the scenes projects that I'm not yet able to share and lots of DIY projects and design updates around our house that I am able to share, confusing right?
I'm super excited to share this recent update to our bedroom. We recently decided to change the light fixture in our bedroom for one we absolutely love. When I was shopping for new lighting for our bedroom during our house re-build I wasn't able to find light that was within budget and that I loved. So we decided to buy the same light fixture we previously had in our bedroom. I loved the lighting our bedroom before and this time around, I liked it but was never married to the style of it in our bedroom. Just like personal style changes, I also believe our taste in home design changes. We go though different cycles of what we love and so on. Looking back, I should have just stuck up boob light and called it a day until we found 'the one.' Live and learn right.
Ever since I picked our Avery's atomic lighting for his bedroom, I've been smitten with the idea of adding a grownup version in our bedroom. However a grownup version is pretty pricey, but I couldn't get these images of atomic lighting in bedroom out of my head. I love how modern whimsical the light looks and love its nod to our homes mid century roots. Plain and simple, I wanted one to enjoy too! Isn't the bedroom below fantastic, for the lighting + vintage credenza is everything.
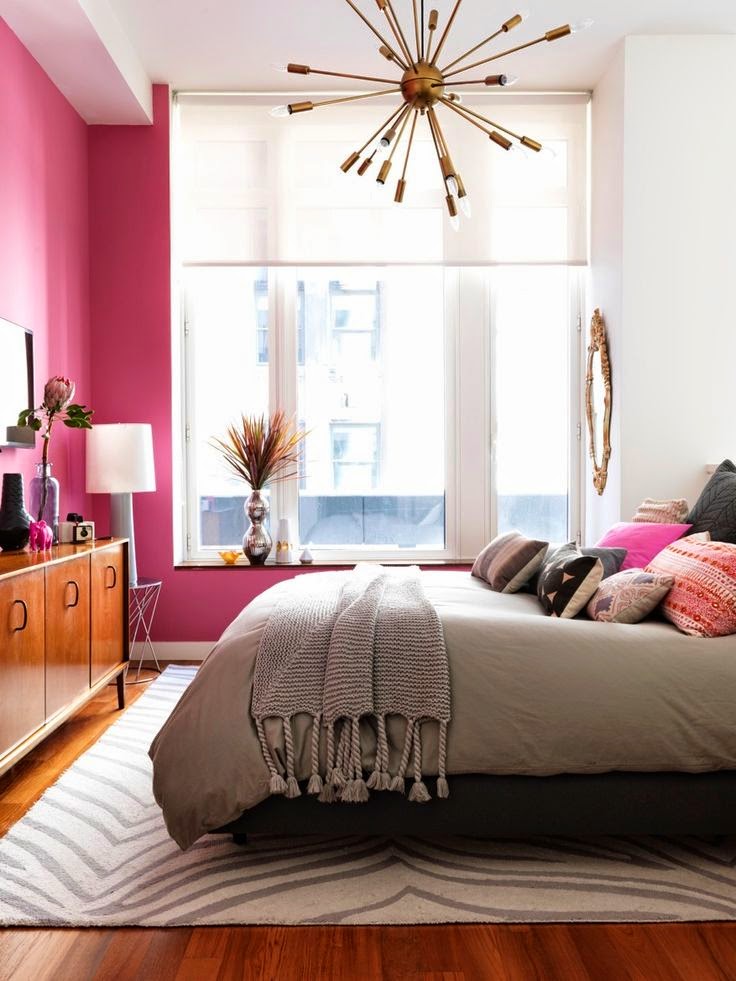
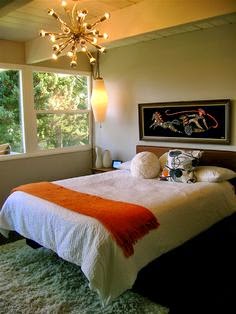
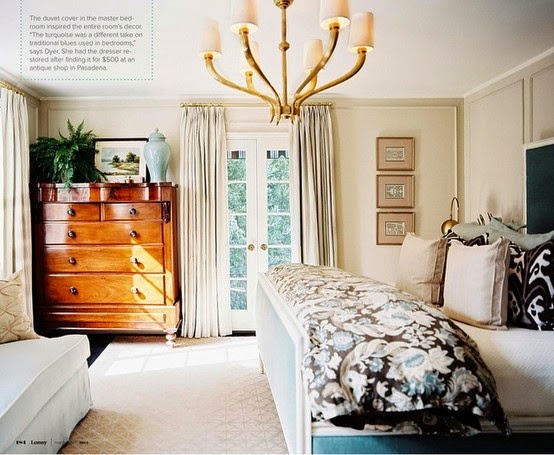
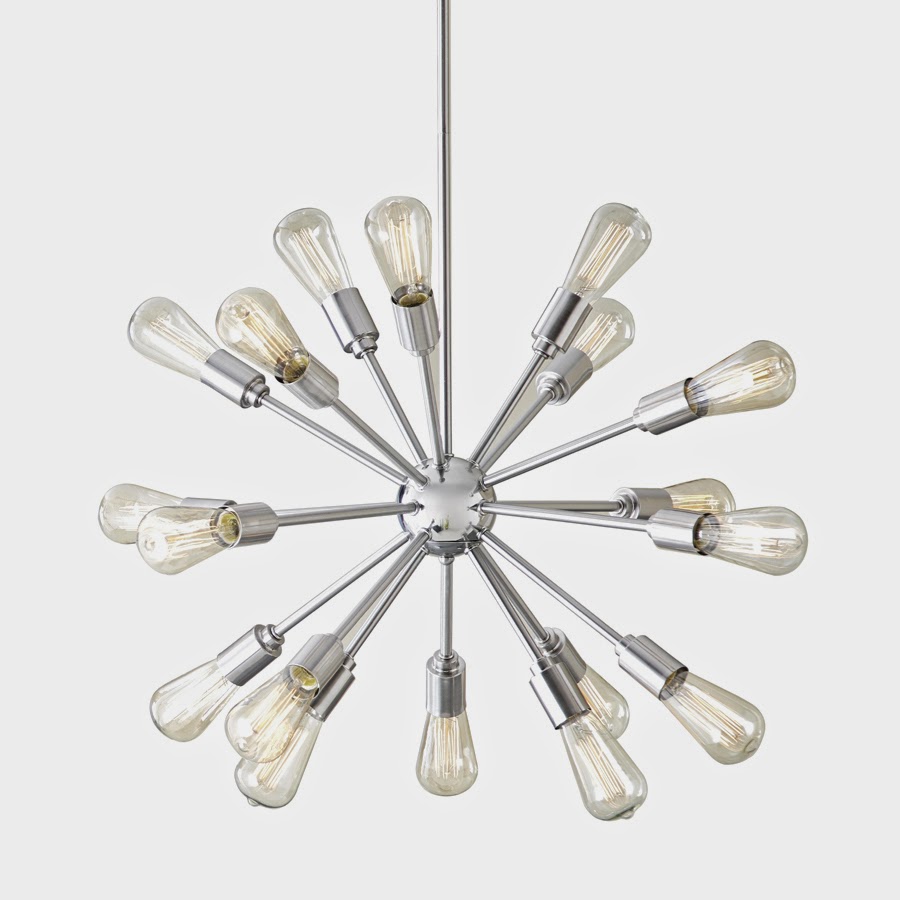
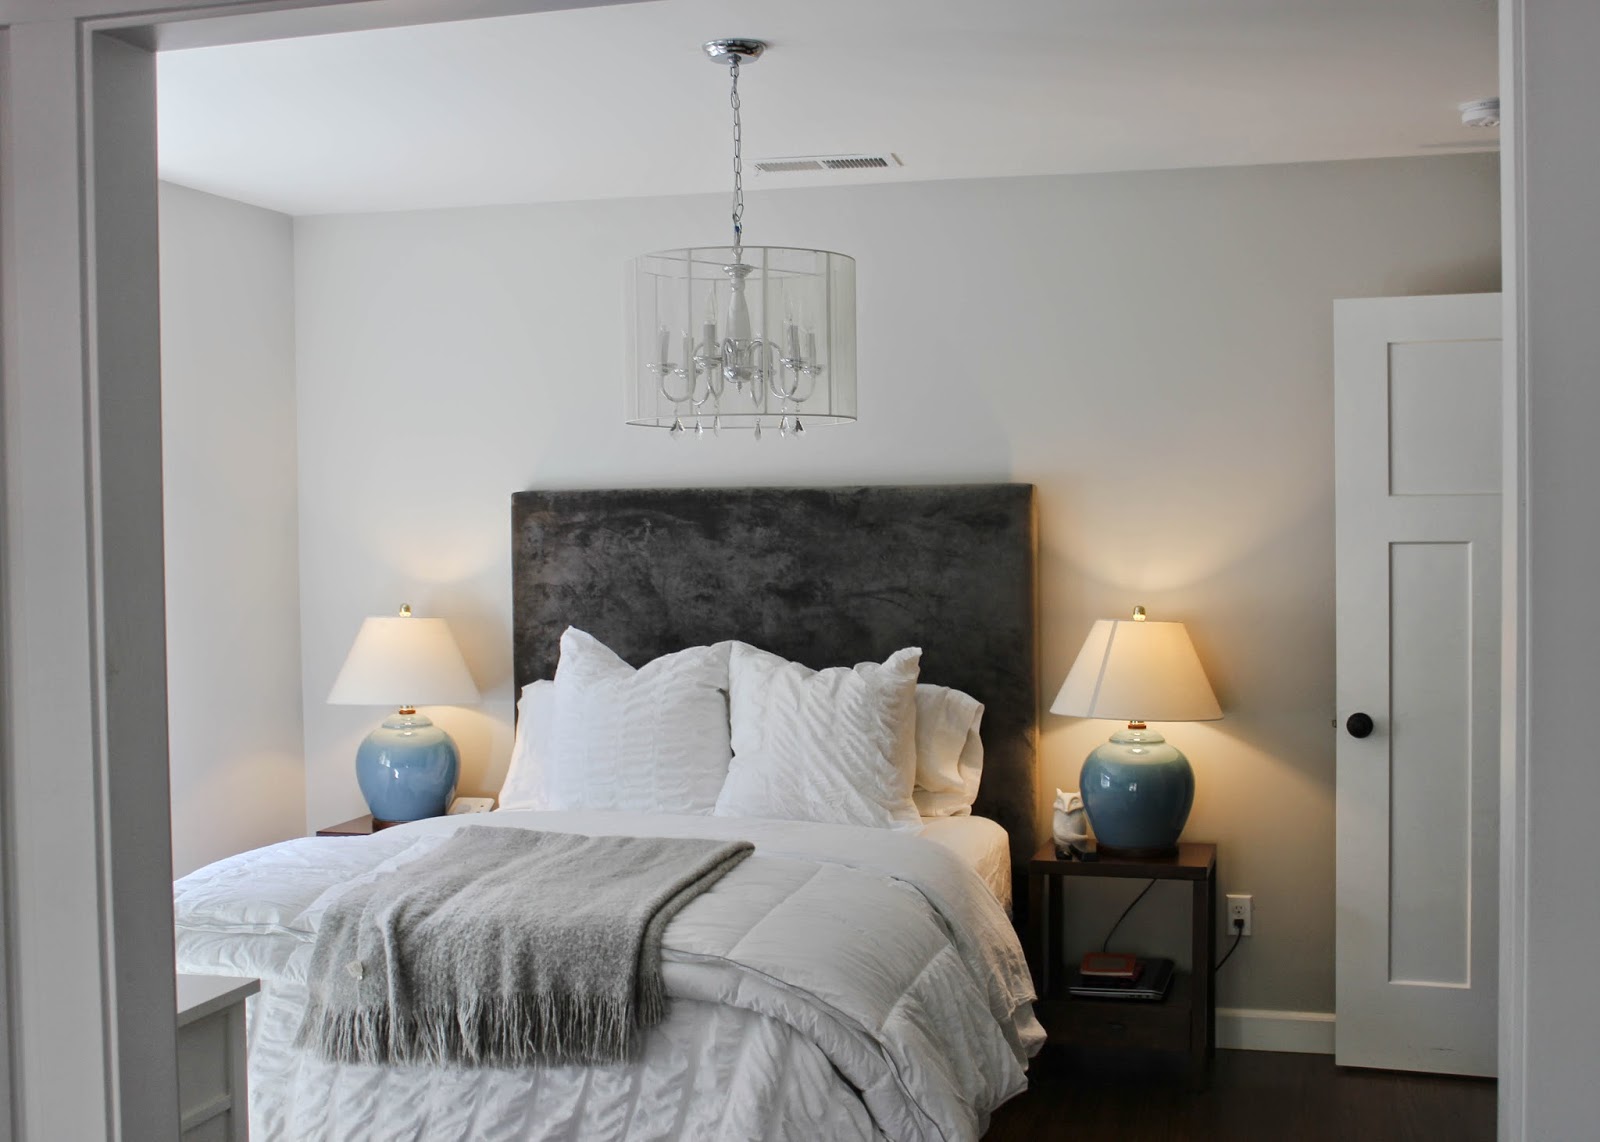
But Hasani wasn't on board, he didn't like look of the light for a bedroom, until we were shopping in Lowes one Saturday afternoon and he loved it! A few seconds later the light fixture was in our shopping cart and we were speeding home for the installation. Here's our bedroom before the lighting change up.
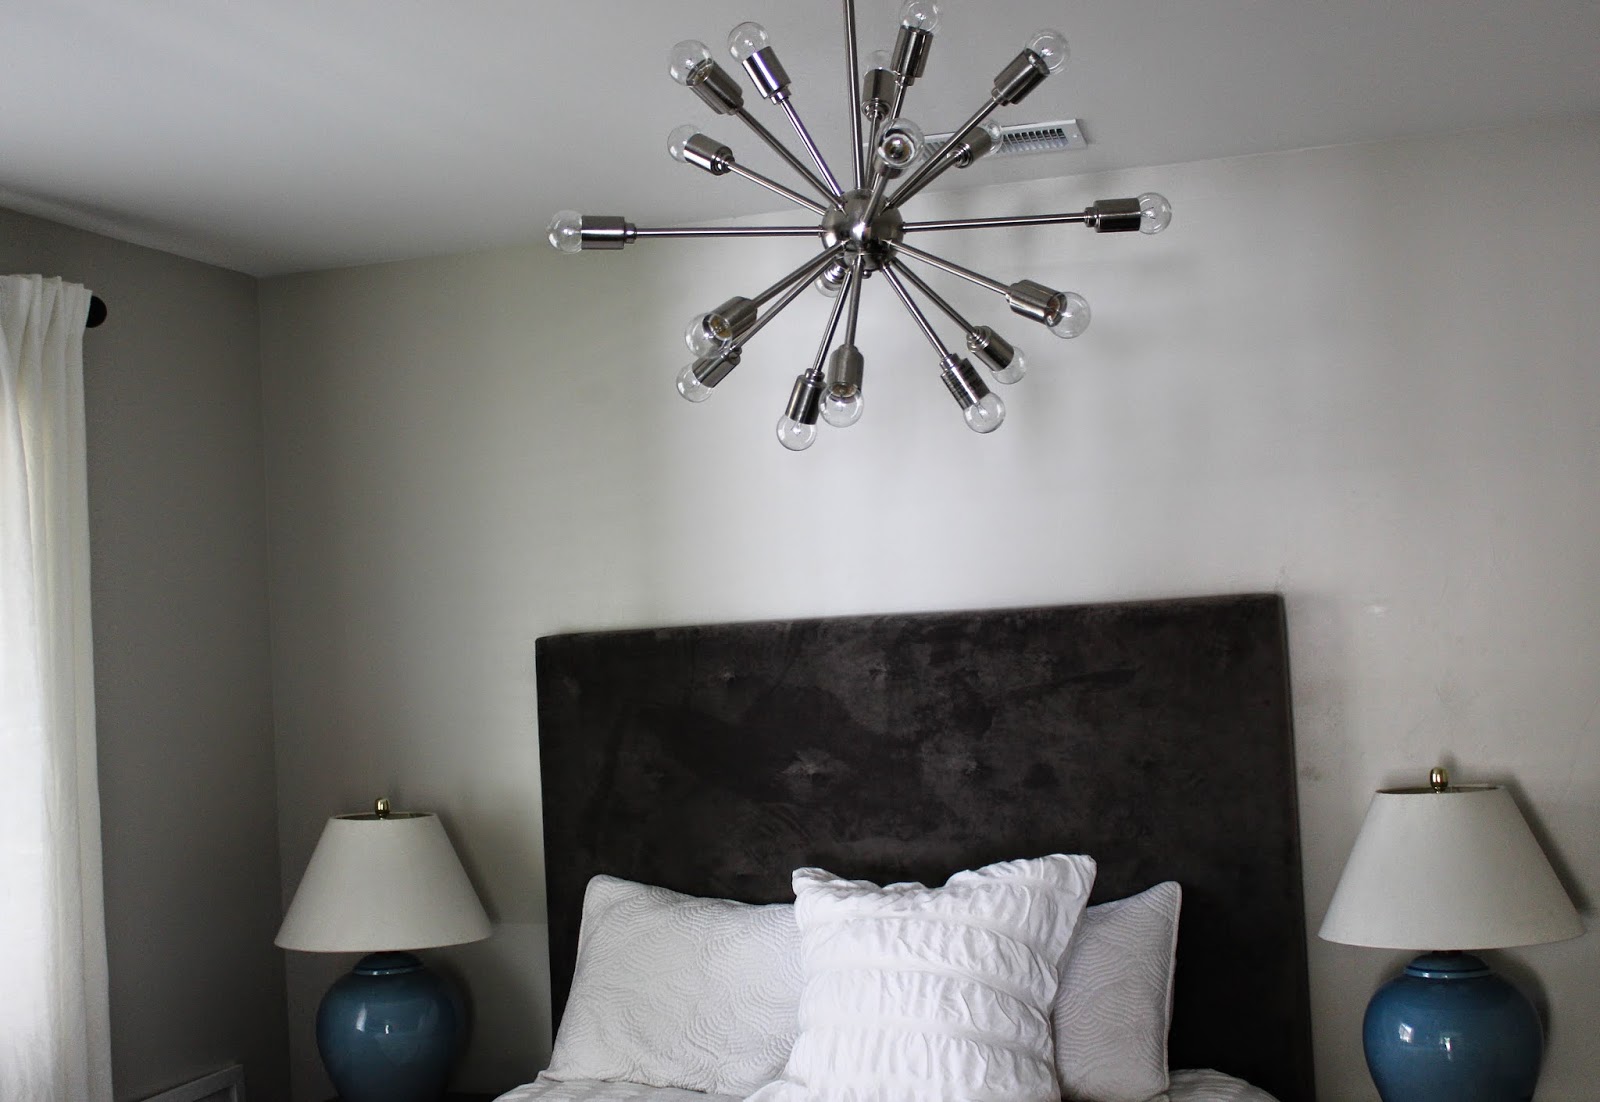
The light fixture originally came with 18 60 watt vintage style bulbs, making it to hot to leave on, casting a yellow tone and too large in appearance, not the look we're going for. We switched out the light bulbs for simple clear round ones, the instant change up was exactly the look we're going for. Here's a little peak of our new light fixture in place. I recently made some new Euro pillows and added more pattern in our bedding which I'll be sharing very soon. '
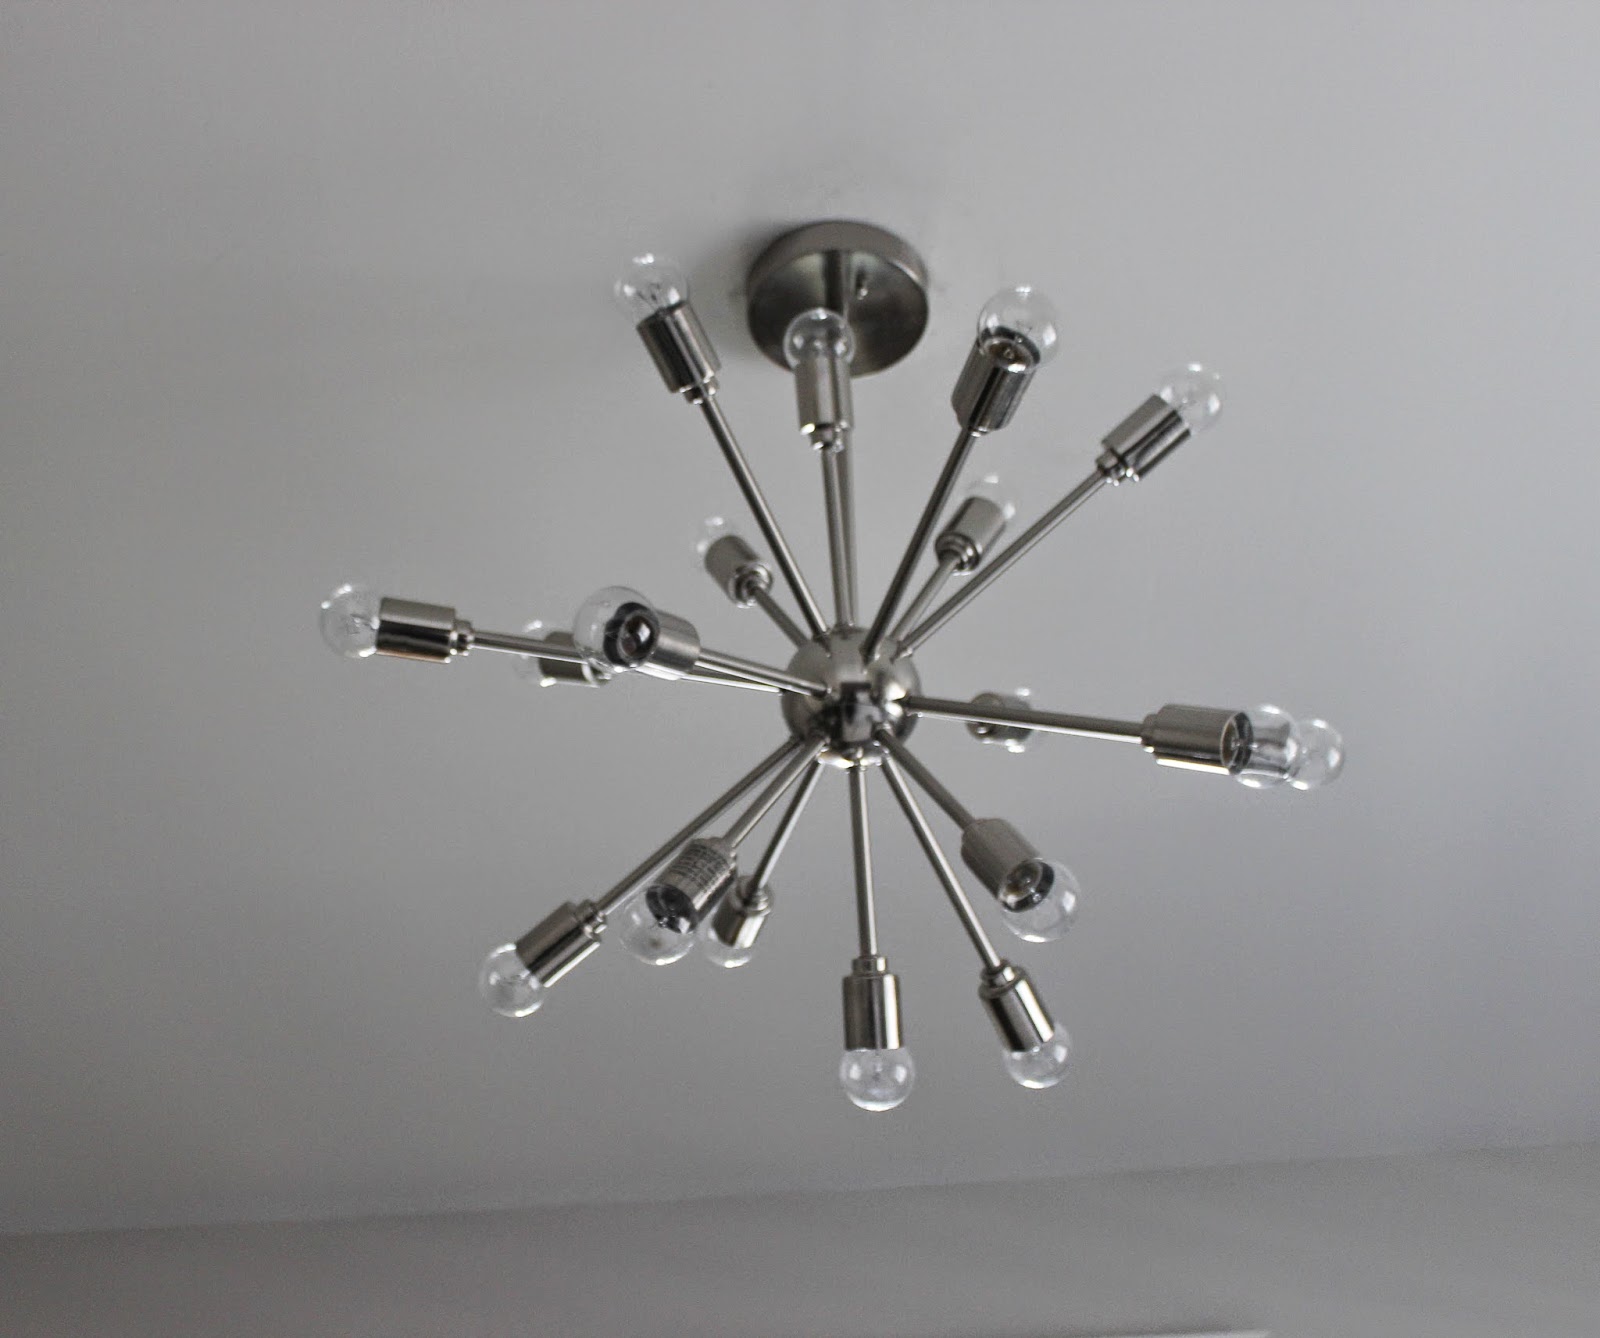
In the near future, I plan on trying out a few other light bulbs just for fun! With this light fixture, light bulbs can also it a whole new look. I'd love to sprinkle in a few silver tip light bulbs sprinkled in with clear light bulbs.
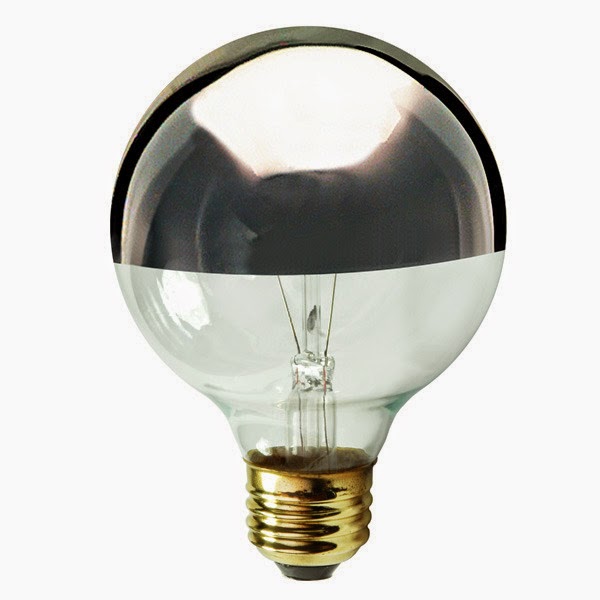
The plan for our old light fixture is to hopefully sell it on Craigslist and re-coop a little of the money we originally spent on the light fixture.
What's your take on lighting simple and understated or big and bold?
I'm super excited to share this recent update to our bedroom. We recently decided to change the light fixture in our bedroom for one we absolutely love. When I was shopping for new lighting for our bedroom during our house re-build I wasn't able to find light that was within budget and that I loved. So we decided to buy the same light fixture we previously had in our bedroom. I loved the lighting our bedroom before and this time around, I liked it but was never married to the style of it in our bedroom. Just like personal style changes, I also believe our taste in home design changes. We go though different cycles of what we love and so on. Looking back, I should have just stuck up boob light and called it a day until we found 'the one.' Live and learn right.
Ever since I picked our Avery's atomic lighting for his bedroom, I've been smitten with the idea of adding a grownup version in our bedroom. However a grownup version is pretty pricey, but I couldn't get these images of atomic lighting in bedroom out of my head. I love how modern whimsical the light looks and love its nod to our homes mid century roots. Plain and simple, I wanted one to enjoy too! Isn't the bedroom below fantastic, for the lighting + vintage credenza is everything.
Image via Pinterest
Image via Pinterest
Checkout this Statement light fixture in bedroom, large and bold and perfect
I absolutely love the 'bones' of our bedroom all its natural light, french doors plus now having a en-suite bathroom make me giddy to create a lovely retreat with wow lighting. I totally believe the right lighting can be a game changer. Recently Lowes debuted a new Sputnik like light fixture and I loved it! Tiffany from Living Savvy recently installed the Sputnik in their dining room and gave it a makeover with gold spray paint and it looks fantastic!
But Hasani wasn't on board, he didn't like look of the light for a bedroom, until we were shopping in Lowes one Saturday afternoon and he loved it! A few seconds later the light fixture was in our shopping cart and we were speeding home for the installation. Here's our bedroom before the lighting change up.
The light fixture originally came with 18 60 watt vintage style bulbs, making it to hot to leave on, casting a yellow tone and too large in appearance, not the look we're going for. We switched out the light bulbs for simple clear round ones, the instant change up was exactly the look we're going for. Here's a little peak of our new light fixture in place. I recently made some new Euro pillows and added more pattern in our bedding which I'll be sharing very soon. '
In the near future, I plan on trying out a few other light bulbs just for fun! With this light fixture, light bulbs can also it a whole new look. I'd love to sprinkle in a few silver tip light bulbs sprinkled in with clear light bulbs.
The plan for our old light fixture is to hopefully sell it on Craigslist and re-coop a little of the money we originally spent on the light fixture.
What's your take on lighting simple and understated or big and bold?
Subscribe to:
Posts (Atom)
You Make Also Like