DIY Roman Shade for My Kitchen

Tuesday, May 27, 2014

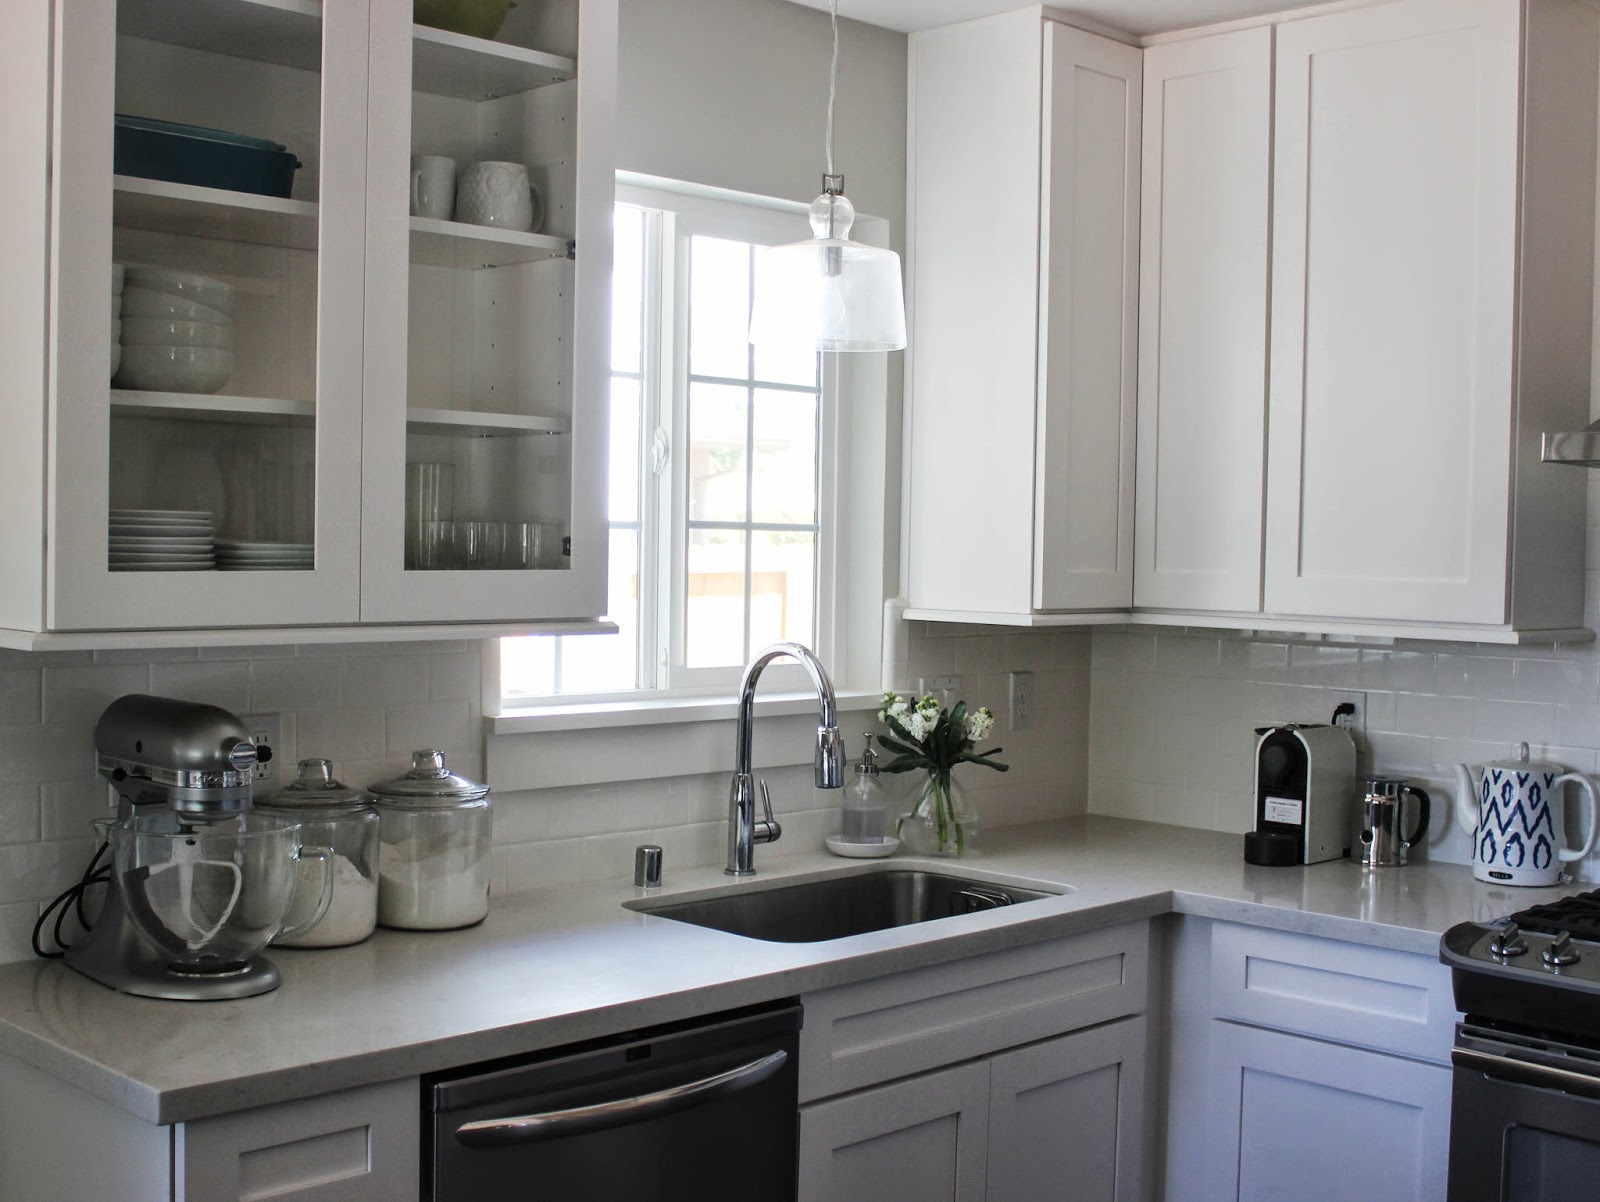
If you follow me on Instagram, then you already got a sneak peek of the project I was working on over the weekend, Roman Shades. I've been wanting to add a roman shade in my kitchen for quite sometime, but I couldn't find the perfect fabric that I loved and Hasani loved. I finally found the perfect fabric at Tonic Living called Monarch Trellis in turquoise. We both loved the fabric! I snagged the fabric on sale plus saved an additional 10% during a Spring Sale off which helped, since the fabric was pricey for my budget. But since we've been getting so many good deals on things we've been slowly adding to our home, this was my little splurge for my kitchen and just what it needed. Here's a reminder of how my kitchen looks. Super white and bright and in need of a little wow factor in terms of color. 


For my kitchen window, I decided to DIY a Roman Shade, just like I did for Avery's bedroom windows, you can see his Roman Shades here. I have awesome friends who also love talking projects and the same friend that helped me last time with Avery's shades, helped me over the weekend with a kitchen shade and a bathroom shade (I'll share the bathroom shade in another post!) Roman Shade for my kitchen turned out amazing!! I'm head over heels in love with it, just like I am with Avery's shades. 

Here are my new DIY fully functional new sew Roman Shades! For me its a challenge taking really good shots of windows without them getting to dark or blow out looking from the sun, so I did my best to capture the beauty of the fabric. The Monarch Trellis fabric is heavy and has a slightly taupe cream background, that looks so good with my white cabinets. At first when the fabric arrived, I was afraid the background was too dark, not that shade is made and up, I'm head over heels in love with them! 


I plan on having the shades up during the day, and closed at night so here's a shot of them down. The pattern is so pretty and my friend and I took our time to make sure everything lines up perfectly when up and closed. 


I originally bought a plain pre-made Roman shade in white from JCP on sale and covered the shade with fabric, turning the basic shade into a custom Roman Shade. The original shade fabric is polyester, so it acts as a lining shade once its been cover with fabric of your choice. 

The roman shades from JCP come in the standard length of 64 inches long, which is way too long for my kitchen window, so I shorten the shade! I simply measure my window and decided how far above my window I wanted my shade to hang and then measured the shade. I decided on 46 inches, which meant cutting off the bottom two sections of the shade. Before cutting, I carefully cut the string on the bottom of the shade, then cut two sections off leaving a small flap so I could attach the string. I basically copier how they were previously attached on the shade. I was nervous at first but it was super easy and came out perfect.  

If your wanting to make your own customized Roman Shade, please click here for the how to. If you have any questions along the way please feel free to email me at [email protected] and I'll try my best to help! There's a lot of ironing and pinning and unpinning and gluing involved in this project, but the end result is stunning and feels very rewarding!! 

What do you think of my new Roman Shade in my kitchen? It totally makes me kitchen feel finished and adds the perfect amount of color.

Our Patio in Progress

Thursday, May 22, 2014

I'm so excited to share our patio progress, as I mentioned last week we recently bought a outdoor dining room table, two benches and two chairs from West Elm. We loved the clean modern lines of the table along with the dark espresso finish of the table. We also loved the the table can seat up to eight people which makes it the perfect table for us when we entertain. Our goal is for our patio to be an extension of our home giving us extra living space. My plan is for patio & backyard to a be a comfortable spot that my family and I enjoy hanging out, grilling, dining outside and having fun. Before I share progress pictures of our patio with our new furniture, lets take a look at how our patio looked last Summer. Empty, but with so much potential. 


Here's our current patio progress. For now we placed the table near the our raised garden bed, so while we're enjoying a meal outside we can look at our garden. I adore this view and love how this part our yard is ties in with the patio. Do you see how large our tomato plants are getting in the garden? They've practically doubled in size in the last week!


Patio Plans 

As you can see in the picture below, we have lots of room to add more patio furniture. We'd like to add either a sectional or a sofa and two chairs and a coffee table. I'm picturing a sofa or sectional filled with colorful comfy pillows. I'd also like to add a rug to help define our lounge area on the patio. We're thinking our building an outdoor console table to hold drink dispensers and food. This weekend, I'll be filling up our DIY A Frame Plant stand with pots and plants, I'll share the after next week! We have two outdoor lights, but I'd love to add string lights to hang from the pergola. I plan on repainting the four large neglected terra cotta pots and plant flowers, and mint in them and placing on our patio. most likely we'll upgrade the size of the pot of lime tree currently resides in, I'd like to build something similar to this from Williams-Sonoma. We also have plans to build a cover for our crawl space that's located on our patio, once its built we hope it helps the patio flow appear more seamless. 

In addition to adding a cover for our crawl space, we either want to pour a larger concrete step (simular to our step off our french doors, see here) off our laundry room door or build a larger cedar step. Right now the current step just feels so dinky, I want one with more substance and enough room to pots on and fill in the space better. So that's for sure on my list! 


We still have lots of patio cleanup to do and its a work in progress, but I'm so happy with the direction we're heading in. 

What do you think so far? How do you like our new dining table set? 

My Favorite Farmers Market Salad

Wednesday, May 21, 2014

I've recently decided to add a new series on my blog simply titled My Favorite. I hope you all enjoy this series. I love sharing things in my life that make me happy: good food, great drinks, the perfect workout playlist, yummy deserts, best paint colors and pretty much anything under the sun will be my topic of choice. I'm kicking this series off, with my favorite salad. 

By far my favorite salad of all time is the Farmers Market Salad. I had the most amazing salad at a restaurant a few years ago and I just had to make it at home to enjoy. The salad is super easy and full of yummy fresh ingredients including making your own cornbread croutons. I love croutons in my salad, I find making my own super easy and fun. 

Farmers Market Salad


What You'll Need

Mixed Green Lettuce 
Grilled Chicken Breast or Rotisserie Chicken
Avocado
Fresh Corn (if in season) or Frozen Corn  
Cherry Tomatoes
Hard Boiled Egg
Raisins or Dates or Cranberries (your choice)
Goat Cheese (substitute Feta)
Homemade Cornbread Croutons (see recipe below)

Assemble the salad and toss with ranch dressing or serve the dressing on the side and top with fresh black pepper. I left out the amounts on purpose, so you can easily the portions based on the size salad you want. 


Crouton Recipe

Use box cornbread or make your own. Bake cornbread per package directions, let it sit out (covered) and use the next day. Cut cornbread into squares, and lightly toss them with extra virgin olive oil and salt and pepper to taste. Bake at 425 degrees for about 10 minutes, rotate and flip croutons as needed. I personally, don't like using Jiffy to make cornbread croutons, I find the mix to be too dry. Look for a cornbread mixture that is more cake like in texture when baked (think soft and fluffy, which equals yummy soft on the inside croutons) 

I hope you enjoy the farmers market salad as mush as I do, its super filling and oh so yummy! The creaminess of the goat cheese mixed with the sweetness of the raisins incredible! I'm so happy I can enjoy this salad at home and make a small one for myself, or a large one for my family. 

What's your favorite salad? Feel free to share the recipe, I love trying new dishes! 

ps: Don't forget to enter the Giveaway for a free copy of the book The Organically Clean Home - there's only a few days left to enter! 

Giveaway: The Organically Clean Home

Monday, May 19, 2014

I'm super excited about this Giveaway to for the new book The Organically Clean Home written by Becky Rapinchuk. Over the past few months I've been looking for an organic way to clean my home and replace the slew of toxic cleaning products. I honestly didn't know where to start, and if the homemade products would be just as good as the store bought products. I found Becky's book to be a fun quick read with lots of recipes to make my own safe cleaning products to clean my home inside out, plus save! I've a thrifty girl, so this book makes me even more exicted to save money one cleaning products and use that money elsewhere on my home. 


Below are my clean home helpers: The Organically Clean Home, Borax, Baking Soda and spay bottle. Please enter below to win your free copy of the book!! 


a Rafflecopter giveaway

This Close

Thursday, May 15, 2014

We are this close to being able to start dining AL Fresco most evenings! We recently ordered an outdoor dinning set from West Elm during there 20% off sale (I believe its still going on now) Let's be real, outdoor furniture is crazy expensive and least the stuff I seem to fall in love with. We've been saving up and waiting to buy what we really loved and will love we a long time and of course waiting to find something on sale. Originally we loved a table from Ikea (and the WE table) and the chairs from WE, but sadly the table from Ikea was out of stock with no 'real' in-stock dates. When the dining set from WE went on sale we waited and then decided to go for it! Our new dining table, chairs and benches arrived on Saturday! We decided to go with the Wood Slat Collection, we loved the clean modern lines of of the table and benches, and love the look of the dining room chairs. 


We have a bit of cleanup do do out patio: removing recyclables, cleaning the cement etc. Before we can officially enjoy our new set. In the meantime, here's a little glimpses of our table its still wrapped in plastic, but here's a view of our bench. I plan on sharing lots of pictures next week once our dining room table is place, sorry to be such a tease! I can already say that I'm in love with how the dining room table looks in on patio even thought its covered in plastic! I'm a happy girl :)


I'm still working on finalizing the layout for the out door living space. Our goal for our outdoor living area is for the space to feel like and extension of our home giving us extra daily usable living space. The weather in Sacramento is similar to a the Mediterranean region where we have very mild Winters (just cold temps and rain) and very warm Spring, Summer and Fall temperatures. With that in mind its essential for us to use every square inch of our backyard with purpose. So close to reaching our goals! 

What are your Spring / Summer goals for your outdoor space? 

Planting Season in Our Garden

Monday, May 12, 2014

At the end of April we finally were able to plant our garden! We finally decided we wanted a salsa / herb / pizza garden. We wanted to make sure we grew things we actually eat and use on a regular basis. This year we bought all of our plants locally at Green Acres and picked up a few veggies from Home Depot. We hope to plant a year round garden and hopefully if I plan accordingly we'll start planting our future veggies from seed and then transplant them into our raised garden beds. We added two sections of trellis,to help support our tomatoes and bell peppers as they grow. 

Let's take a look at our newly built garden bed we recently built and added irrigation to. 


I still need to properly mark our veggies, I found these wood markers for a steal on Williams Sonoma and plan on giving them a little makeover so they'll work better for our garden. 
Here's a list of what we decided to grow. 
Back: Red Bell Pepper, Orange Bell Pepper, Yellow Bell Pepper, Greek Basil, Roma Tomatoes, Cherry Tomatoes and Beef Steak Tomatoes
Front: Jalapeno Pepper, Sweet Banana Pepper, Sweet Pickle Pepper, Sweet Basil, Rosemary and Cilantro 

Its hard to believe a few short weeks ago these spot in our backyard was full of weeds, and debris and now we're this much closer to producing herbs and vegetables for our home. Look how far we've come!


This view from my kitchen window is so much better than the old one! 


This area of our yard is still a work in progress, in the future we plan to add a privacy trellis to help conceal our waste containers. We also want to layer in more plants around our raised garden bed to add color and more visual interest.


I'll share updates as the months go on as our veggies start producing. 

Have you planted your garden for this year? Any tips on growing lots of veggies?

Spine Bookcase for Teen Bedroom

Thursday, May 8, 2014

My oldest son and I are beginning to work on his bedroom and take it from its current blank slate and add personality, his personality. Lucky for me, my oldest loves to read! He's the type of kid that will use his allowance money on books and sometimes video games. We've slowly been rebuilding his book collection since the fire and he wanted a fun way to display his books and allow them to be close, like me he likes to re-read his books. A few months back he was flipping though the CB2 mailer I got in the mail and loved the look for the Array Bookcase. I loved it too, its such a fun and cool way to display books in a modern and compact way and adds to much visual interest to a room. Here's the Array bookcase from CB2


Image via CB2
Now for some book spine inspiration. 


Image via The Red Thread

Image via Decor Pad

Image via The Nest Blog

What I didn't love was its  $189.00 price, so I looked online and came across one a similar version on Amazon. The one on Amazon was less than half the price of the CB2 version, only costing me $87 + tax and free shipping, gotta love Amazon Prime. Tabari loved silver the best, but on Amazon they come in a few colors (yellow / silver & orange) 
The bookcase arrived on Monday, and I was shocked how heavy the it is and its height. It was super fast to put together, I used the Allen wrench it came with and took only about 15 mins to put together. Tabari picked a spot in his bedroom and started filling the tower up. Since Tabari's bedroom is on the small side like most 60's ranchers, the bookcases compact and size makes it perfect space saver for for bedroom. We have a ways to go before its full, but regardless love the look. We plan to hit up thrift stores and buy books when there on sale, It shouldn't take too look to fill up the book spine up. He's super happy and already decided he's taking it with him to college, he needs to slow down and start high school first lol. 


Next up for his bedroom, shelves and artwork! He's found a slew of artwork he loves on Etsy and I've already bought a few prints for his bedroom. I plan to share progress of his bedroom as we tackle projects. 

What do you think of Spine Bookcases?

Life Via Instagram April

Wednesday, May 7, 2014

I'm back at it, after months of forgetting to share a round of my monthly Instagram pictures, I decided now is the perfect time to start up again. For me days seems long, but months go by in a flash and this is my little way of remembering these moments & sharing snippets of our day to day life. We kicked off April by celebrating my birthday (Aries Nation) with the kids and then Hasani and I did a quick getaway to the Wine County, I new tried recipes, drank yummy lattes and more! Feel free to follow me at in Instagram @mrsclh  


Row One: Reading the latest issue of Sunset magazine and loving all the information on gardening // Heading out to dinner with my boys
Row Two: Drinking a yummy latte in Santa Rosa // Picking up a yard of Garden mix for our raised garden bed // Tried a new recipe Tortilla Casserole and made it using a spring form pan
Row Three: Coloring Easter Eggs with Avery & Tabari. // Easter breakfast, fresh mixed berries and baked Texas French toast // Built at an A Frame plant stand for our patio. 

Row One: Tried another yummy recipe via The Mom 100 Cookbook // Framing pretty wrapping paper for Avery's gallery wall // Enjoying my kitchen window view and simple blooms picked up from Trader Joes
Row Two: Weighing clementines I bought to make a cake // Yet another view of pretty view of my kitchen window and orange tree  // Trying Stella Artois Cider for the first time with homemade Saffron Risotto 
Row Three: Super happy that my Fiddle Leaf Fig Tree is finally growing! // Chasing Avery in our backyard // Checking out the flowers blooming on our strawberry vines 

I hope your April was full of fun memories too! I hope to see you on Instagram!

Homemade Clementine Cake

Thursday, May 1, 2014

A few months ago Tabari and I saw the movie The Secret Life of Walter Mitty, and we both loved the movie and were intrigued by the cake mentioned in the movie a few times. We recently watched the movie again as a family and this time around Tabari made me promise to make the cake. So began my search to find the recipe for the Clementine Cake from the movie. The things we do for our kids, lol. The original recipe is from Nigella Lawson found on the Food Network.

One of things I found so intriguing about this cake is it using the entire Clementine, skin in all! Also instead of using regular flour, you use crushed almonds! Yup another exclamation point is needed for the the above sentence. I took the following pictures on my cell phone, so please forgive the the graininess. 


The recipe from Smitten Kitchen suggests using  5-6 clementines, but my clementines were on the small side and I ended up using 9 clementines. 

The following recipe is adapted from Nigella Lawson.

Homemade Clementine Cake

8-9 small Clementines
6 large eggs 
1 1/4 cups of Sugar
2 13 cups of Almond Flour (I bought Almond flour from Trader Joes)
1 teaspoon of baking powder. 

Place the clementines in a medium size bowl and fill with water, bring the clementines to a boil cover and cook for two hours. Once the clementines are done cooking, let them cool and then slice the clementines in pieces. Next utter the sides of the pan and line a 9 inch spring form pan with parchment paper and turn the oven on to 375 degrees. 

Place the clementines in a food processor or blender and mix until smooth. 

Next blend together the eggs and sugar once blended well add in the almond flour and baking powder. Pour batter into the spring form pan. Check on cake at 30 mins and bake until knife comes out clean. I baked my Clementine Cake for 40 mins. Allow cake to completely cool before removing the cake from the spring form pan. 


I made vanilla butter cream frosting for the cake, but you can easily make a glaze or serve it plain. I liked that the butter cream added a bit of sweetness to the cake. 


The cake tuned out amazing and super moist. It tastes like a light citrus cake and so flavorful. My family loved the cake, it didn't last long in my house! Avery even asked for 'more please' after he had his fist slice lol. Even though boiling the clementines was time consuming, I'll be making this cake again very soon. I think this cake is perfect for a brunch, since its so light yet very filing.  

You Make Also Like

Related Posts Plugin for WordPress, Blogger...