

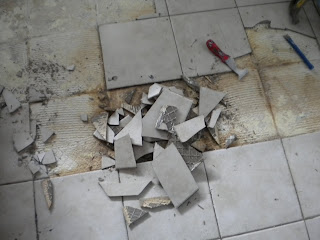
We finally torn up the cracked, stained, Ugly tile up in the dining room and kitchen!
I was nervous in the weeks approaching 'Removal of the Tile' Why? Because, I did want to deal with a huge mess and what if this harder then it looks on TV? I decided to some research and find the easiest way to tear ceramic up tile.
Supplies Needed:
- Drop cloth
- Rubber Mallet
- Hammers
- Wood Shins
- Chisel Set
- Eye Glasses & Face Mask
- Heavy Broom, Dust Pan & Trash Can
- Heavy Duty Paint Scrapper
- Tile Scrapper
- Shop Vacuum (optional)
1. We emptied the entire dining room and kitchen out and place plastic over the vents in the ceiling and plastic of over the entrance to the kitchen/dining room to contain the dust.
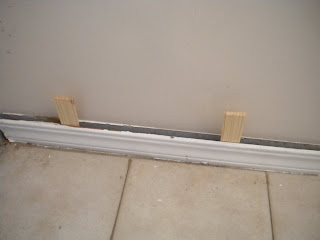
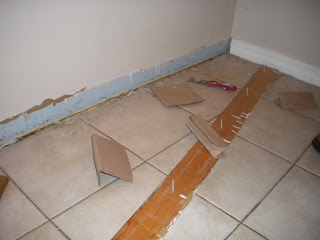
2. We removed all the baseboards. Removing the baseboards to some patience, but it was worth it all the baseboards remained in tact! Which saves money. We placed a heavy duty paint scrapper on the top of the baseboard, then gently tapped it with a rubber mallet loosening up the baseboards. Next place wood shins into the baseboards - which helps loosen the nails. CAREFULLY remove the baseboard.
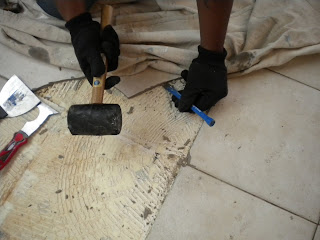
4. Carefully remove all the tile, we placed a drop cloth over the section of tile we planned on removing to avoid tile filing everywhere! Which it will. We hammer away with our chisel and where able to remove large sections of tile easy. Work smarter not harder. We would stop all sweep up all the debris and tile chunks along the way, less to cleanup
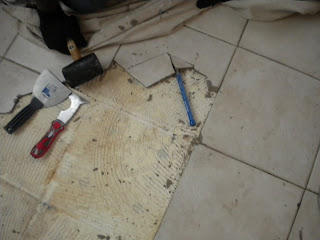
What We Learned:
- Gather all your supplies the night before, trips back and forth to Lowes are not fun. We had one trip, MR CLH forgot to buy himself safety goggles
- Have fun! Remember it gets ugly before it gets pretty
- Work Smarter not Harder - take you time tearing up tile, less mess to clean up
- We also learmed removing tile was the easy part - the next step in the Demo process was mucher harder for us
I think this is easy (sometimes long and boring) DIY project - I'd recommend a two person team in a space larger then a bathroom. It took us two days from start to finish for both rooms, I think we would have completed the removal of the tile faster, if we started earlier. We didn't start until 11:30 on Sat - way to late to start a project.
Part Two - Removing the Thin Set & Why ony DIY Projects on TV get done in one day














Oh boy... it seems like we always have to make multiple trips to the hardware store during a project. Can't wait to see the new flooring!
ReplyDeleteWell, someone had "fun" this weekend!
ReplyDeleteWow, this was quite the task, but will be well worth it in the end. Looking forward to Part 2.
ReplyDeleteWhat a project! You are brave. Can't wait to see the final pictures!!
ReplyDeleteDanielle
It's so satisfying to do projects yourself. Are you guys installing hardwood or tile?
ReplyDeleteLooks like a lot of work. Thank you for the tutorial - it'll come in handy when we tear up our bathroom tiles!
ReplyDeleteAlso, I wanted to tell you I've tagged you with the Happy 101 Award (http://fixingitfancy.com/?p=149)!
Hi Dayka - We decided to go with Faux Wood in the dining room and kitchen - less stress. We have original hardwood in the whole house, that need to be done!
ReplyDeleteHi Angela - thanks for the award! Your too sweet :)
i would love to create a new look for the floor we currently have; however i will have to pay someone. it looks like work i just dont want to committ to. i would start but NEVA finish! Shame on me! Great job...cant wait for the look..
ReplyDeleteBrooke - the crazy part for us so far is the Tearing up tile was the easy part! You'll see what I mean when we finish part two
ReplyDeleteTile removal is just as challenging as laying out tiles. When me and my dad started to dispose of our tiles to make way for our new laminate flooring (Tampa was the place where we did this project), it took us a lot of time to pound each and one of them and pry it off. After all is done, we went to the Lakeland flooring store on the next day to pick the right one that is simple yet awesome.
ReplyDeleteWhat's up, after reading this awesome paragraph i am too delighted to share my familiarity here with friends.
ReplyDeleteMy blog post - Thermocouple Thermometer